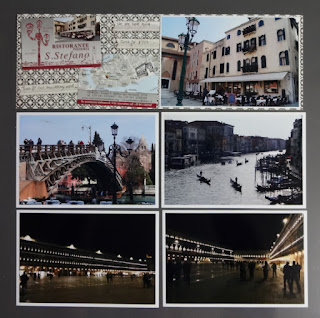
For some time now, I have been using Project Life style pocket page protectors as part of my scrapbooking, even though I don't do Project Life in its original form. I have found that it's a great way to include a lot of photos, whilst still doing a traditional layout with my favourite pictures. The problem is - how to photograph the resulting filled page protector without the reflective glare. Of course the answer is obvious, once you see how other people have done it .... LOL. Take the photos out, arrange them on a flat surface, then take the picture! Duh.....
These pages are the front and back of a protector with one 4 x 12 pocket along the top and four 6 x 4 landscape pockets underneath.
These are some photos from our 30th wedding anniversary trip to Venice in March this year. The other advantage of the pockets is that you can put ephemera inside, like the card of the restaurant where we ate on our actual anniversary :-)
The first page has two banners with details of the photos on each side. The paper is Basic Grey 'Little Black Dress' and I cut the title on the Silhouette.
We take an awful lot of photos when we go anywhere - the advantage of digital! - and this is a good way to use them. I like to do a 'proper' 12 x 12 layout, then have another page protector with six 6 x 4 pockets and fill both sides with photos and a little journalling.


Gosh you have been busy.
ReplyDeleteThe pocket pages are so useful; aren't they.
From the look of the two previous posts it was seem like your freezer is well on the way to being restocked with yummy goodies.
Toni xx
I love that paper - I must have missed the range from Basic Grey. A great way to use up more photos by using the pocket pages - when I get more organised I am going to start doing this and finally get some of my vacation albums finished!!
ReplyDelete