A blog for cooking and crafts

Showing posts with label birthday card. Show all posts

Monday, 5 November 2018

Distress Oxides over white embossing

My PC hasn't flaked out for a while now ..... fingers crossed!
The weekend before last, I went to the ATDML retreat, had a fab time as always and got a reasonable amount done.
I made these cards:


The image is a Woodware stamp, heat embossed in white and Distress Oxides shmooshed over the top.  They look very delicate :-)

Sunday, 7 October 2018

So many PC problems.... it all seems to be settled at the moment, at least until the next tech support call with Microsoft, when it will doubtless all go pear-shaped again....
So, whilst I am able to blog, here are some cards made with some new Woodware stamps.


I coloured with watercolour pens, then went over with some Wink of Stella for a gleamy effect - not really showing up in the pics!  Since WoS is also water based, it does cause the colouring to 'move' a little, will try it over alcohol markers next time.
A green mat to finish.  Nice and simple!

Monday, 13 August 2018

Silhouettes over pink ink

I was having a play with inks at the last crop.  The first card has an inked-through-aperture background, whilst the second has a stamped background splotchy splat.  Both were then overstamped with a silhouette image.


The mini stars and tree are from Lavinia, the flowers from Nellie Snellen, the splat and mini bubbles from SU, the sentiments from Stamping all Day and SU.  I matted with silver mirri rather than trying to match the pink, it looks quite elegant :-)

Monday, 4 June 2018

Variations on a Theme

I wanted to pack light for this month's crop on Saturday, so I chose one of my Pins - original pin here - and took along various stamps to make variations on the idea.  I die-cut the cardstock to size in white and then some ivory when I ran out of white LOL.  I didn't pack coloured cardstock for mats, but cut those on Sunday and assembled the cards. 


I used silhouette stamps from Lavinia (seedheads), Nellie Snellen (stylised flower stems) and Hot off the Press (feather).  The splats are from Stampin Up and the sentiments from Visible Image.

I do like silhouette stamping :-) 

Friday, 9 March 2018

Stamping Platform - third card

Ok, after this week I will stop calling them first, second, third etc LOL.
I was having a look through my card box and finding that they are mostly birthdays, so I have decided to try and build up a stock of 'other' cards too.  The cards I find most difficult to make are sympathy cards, so I thought I would see what I could come up with.


The lotus is a multi-step stamp set from SU, the sentiment is from my collection, possibly Woodware?  I kept to purple, black and white, with a touch of silver on the first one - that whole frame was to cover up a little mark which mysteriously appeared on the card after I had assembled it!!  It looks quite effective and I'm not sure which one I prefer. Purple for sympathy cards always seems appropriate to me, it was the Victorian colour of mourning.
Having set up the lotus on the stamp platform, I thought I would do a batch, but getting back to birthday cards!


It's fun playing around with colours to see what works :-)  Yellow and two shades of orange for the first, then pale pink and two purples.  The sentiment is from Stamping all Day.
The mats and stamping background are all die-cut, using Rare Earth dies, which fit an A6 card perfectly.


Monday, 5 March 2018

Stamping Platform - first card

I have just got the Stamparatus, the new stamping platform from Stampin Up.  I have been thinking about getting a platform for a while and this one has two plates instead of the more usual one.
My first attempt was somewhat disastrous as I also tried some new inks, and they did not like polymer stamps!  So I went back to trying one new thing at a time LOL.


A simple monotone card, the balloons and sentiment are both SU, and there is also a matching punch so I was able to punch out masks and stamp the centre balloon.  I have had the balloons & punch for some time and not christened them so this is an OotD project too :-) The platform makes placement so easy and the greatest thing is - you know when you stamp a sentiment and it just misses one of the letters?  With this tool you can re-ink the offending letter and re-stamp in exactly the same place.  This is going to be so useful for me, the number of times I have tried to re-stamp by hand and it doesn't quite work, well I couldn't count them!
Further cards to follow during this week :-)

Monday, 26 February 2018

Heart balloons birthday card

This is a rescued card .... I had embossed and distress-inked the background, die-cut a butterfly design and assembled with a peel-off sentiment.  But the more I looked at it, the less I liked the look of the butterflies against the inking.  It sat around the craft room for a while, as I tried to think how to fix it.  Then this unbranded heart balloons die dropped through the letter box....


I use repo Herma, so was able to pull off the butterfly die cut.  But I couldn't remove the sentiment without damaging the background, so I decided to cut the balloons in gold mirri to match it.  The bow to finish off the end of the balloon strings is a Sue Wilson die, quite fiddly to make up but it looks lovely :-)
I like it much better now :-)

Monday, 19 February 2018

Silhouette birthday cards

Quick post today .....
I had a little play at the crop, with some shmooshy distress ink backgrounds, over-stamped with a black silhouette image.


The gears are from Paperartsy, the flower heads from Nellie Snellen and the seedpods, fairy and stars are all from Lavinia stamps.  The sentiments are both from Stamping all Day.  Adhered onto a thin black mat, then onto a white card blank.  Very pleased with these :-)

Sunday, 11 February 2018

Geometric shapes - card challenge

Over at Kool Kitty, Nat has set the February prompt for the challenge.  This month it's geometric shapes - yay!
Here is my circle based card:


I used distress oxide inks through a Clarity stencil, in pink/purple/green combination, directly onto a card blank for a CAS card.  Then I stamped the SU sentiment and the Dali Art butterflies.  All went well until I removed the masking tape - it tore the card - eek!!
What to do?  I cut around the stencilled image to form a sash, laid it onto a new card blank, but then decided that it just looked too plain.  So I cut a trellis circle with a Tonic die and put it under the sash.  The corners of the card were rounded to echo the circular theme.
I actually like the way it has turned out much better than my original plan :-)

Thursday, 11 January 2018

Another Sea Breeze birthday card

Although made at the same time, this didn't fit the challenge of the last post, so I thought I would blog separately :-)


I covered the card blank with the wood grain paper in the Kaisercraft 6.5" Sea breeze collection pad, then made triple panels from the tiny flower paper.  The die is unbranded and I cut it twice to get a second butterfly, which is attached leaving the wings free.  Then it was matted onto a plain stitched circle in white and the sentiment was stamped/embossed and die-cut out.

Sunday, 12 November 2017

50th birthday card

I made this for a work colleague, we presented it yesterday so now I can share :-)


The blank card was cut on the Silhouette, I used this file from Craftsuprint.  It has the card base, a mat and the numbers, all can be cut from a sheet of A4 - I cut the base twice in purple and the mat and numbers in white.
I cut one base in half and embossed it with a folder - I could have just embossed half the main base, but a lot of people had to sign the inside, which would have been difficult on a debossed surface!  Then the embossed half-base was attached to the main one.
The numbers were also embossed and then inked with distress inks in purple, teal and pink.  I attached them to the white mat and then the whole topper to the card.
Then I was a bit stuck - part of the brief was butterflies, but I couldn't find a butterfly die which looked right, perched on the 50.  But whilst looking through the box, I came across the champagne glass and pearly trail, which were perfect.  They were die cut in Bazzill Diamond Bling and the small butterflies were punched to match.  A few pearls and it was done.
I am very pleased with this - she couldn't open all her cards at the party so I hope she is pleased too .... I'll find out tomorrow :-)

Wednesday, 25 October 2017

Out of the Drawer: Grungy pink butterfly birthday card

Another stamp christened .......


I stamped, coloured and masked the Stampendous butterfly/music stamp, then used various splatty stamps over the mask.  The sentiment is from Stamping all Day.
A narrow black mat to finish it off ........ I am actually not too sure whether I like this one or not, maybe it'll grow on me :-)

Thursday, 19 October 2017

Teal butterfly circle birthday card

I was having a play around with some unbranded dies, testing them on cardstock from the scraps box.  This teal butterfly circle looked so nice, I found papers to match and made this card :-)


The backing paper is Kaisercraft Lilac Whispers, I used a sheet from the 6.5" pad.  I was just going to put the die-cut on top of the paper, but decided it looks better on a white circle, which I cut using a Crealies die, the sentiments strip is the same make.  It's a little difficult to get a sense of scale from the photo, the card blank is 4".
Next time I use this die, I think I will cut an extra butterfly to add dimension, but I am very pleased with the way it looks when flat :-)

Sunday, 15 October 2017

Out of the Drawer - embossed pink birthday card

I have an large number of embossing folders - time to do something with them!
I made a lot of different embossed backgrounds and inked them up with various distress inks.  They were cut to fit, adhered to the card blank .... but then what?  I do always have trouble covering up backgrounds LOL.


So this is what I came up with.
I stamped the flower (SU) three times, coloured and punched out.  Then they were layered onto the card, the first flat to the background, the second with 1 mm foam tape and the third on 2 mm tape.  I die-cut the banner and stamped the sentiment onto it.  The original embossing folder was (I think) from Taylored Expressions.
It is a bit pink for me ..... but a perfect addition to The Box :-)

Monday, 2 October 2017

Birthday card: cherry tree on stencilled/stamped background

Although there is no official Blogtober this year, I am going to try and repeat my personal goal from last year - three (or more!) posts a week.
I started this card off with a stencilled circles background in purple.  Then I used a splatter stamp in green over some parts of the stencilling.  The cherry tree is from Lavinia Stamps and the sentiment is from Stampendous, both stamped in black over the background.


Nice simple card this one, quite quick to do and really effective.

Monday, 25 September 2017

Buy it - Try it: Daisy & border birthday card

I used my new SU daisy stamp and punch set to start off this card, together with a Kaisercraft texture stamp and a sentiment banner.  But it was just a bit too CAS for me, I felt it needed something else.
Fast forward a couple of weeks and I had bought some new Kaisercraft dies at the Merly Impressions retreat.  My trial cut of this border die happened to be a nice green from my scraps tray ......


...... and I realised it was the perfect addition to this card!
The daisy was stamped and punched three times, coloured with three SU pink pens, and layered up, with the centre coloured yellow.  I used the same pens to 'ink' up the texture stamp and sentiment, then cut out the stamped image, and die-cut a banner.
I like the layout of this card, think I will try it with an embossed panel in place of the texture stamp next time.

Wednesday, 31 May 2017

Pinspired - Stable Door birthday card

There's probably a more correct name for this - but to me it's a stable door!  The original Pin is here.


Quite tricky to photograph so the full effect can be seen!
I cut an A4 piece of cardstock in half lengthwise, scored at the centre and then carefully cut the top half of the card front off.  Then I used some paper from a 6" pad for the inside and the front, being careful to line up the design so both panels matched.
The flowers are from SU, stamped and punched out.  The card actually sat in my 'to be finished' box for a while, because I couldn't find a stamp which felt right for the sentiment.  Obviously I don't have enough sentiments, after 24 years of stamping....... Hah!!!  Then I was having a bit of a sort out and came across this Woodware one, there are two big stamps in the set and this one looked best. It's now permanently in the stamp bags which comes to every crop with me - can't believe I had forgotten about it!
I really like this, it's a little different and I think it could be adapted quite easily to masculine cards - I'm sure I have just a few cogs and gears stamps just lying around...... LOL.

Monday, 29 May 2017

The same, yet different .....

For these two cards, I used the same stamp, the same inks and the same colour mat.  The difference is that one is stamped on white card and the other on ivory :-)


The image is from Woodware, called 'going to seed', I believe.  It's one of my new favourites!  The background spatters are a Seth Apton stamp and the sentiment is from Stamping all Day.

I'm not sure which version I like best - they both look very effective.

Saturday, 20 May 2017

Distress Oxide birthday cards

I have finally caught up with photographing everything I have made over the last few weeks :-)  These cards are done with Distress Oxide backgrounds.


I used foam blending pads to apply the inks through a stencil, definitely gives a better effect than using a stencil brush.  Then I ran into my normal problem with creating backgrounds - I didn't want to cover it up!!  So I went with a simple die-cut sentiment, but that didn't really stand out from the background.  In the end I matted onto the same colour cardstock as the die-cut and cut a stitched circle as a base for it.  I am really pleased with the effect :-)


The second card is a blended background, over-stamped with a Woodware seedhead stamp in black.  Then I cut into three panels, matted onto black and punched out a sentiment strip.  I am not entirely happy with this one - I think the black mat is a bit harsh and maybe I should have used the same blue as the other card!!!  But it's OK :-)
More experimentation to come!

Friday, 31 March 2017

March yellow challenge

Over at Kool Kitty, the 2017 Pantone colour challenge for this month is yellow.  Not really one of my go-to colours, but I got onto a bit of a roll and have made four!  Well, I wasn't happy with the first one, so I did a second one which gave me the idea for the third, which led to a fourth using the leftover bit ...... you know how it goes :-)


Memory Box Butterflies, Tattered Lace flourish and SU sentiment.  The background paper is from Craft Creations, the butterfly bases are a bronze pearlescent cardstock, doesn't show well in the photo :-)


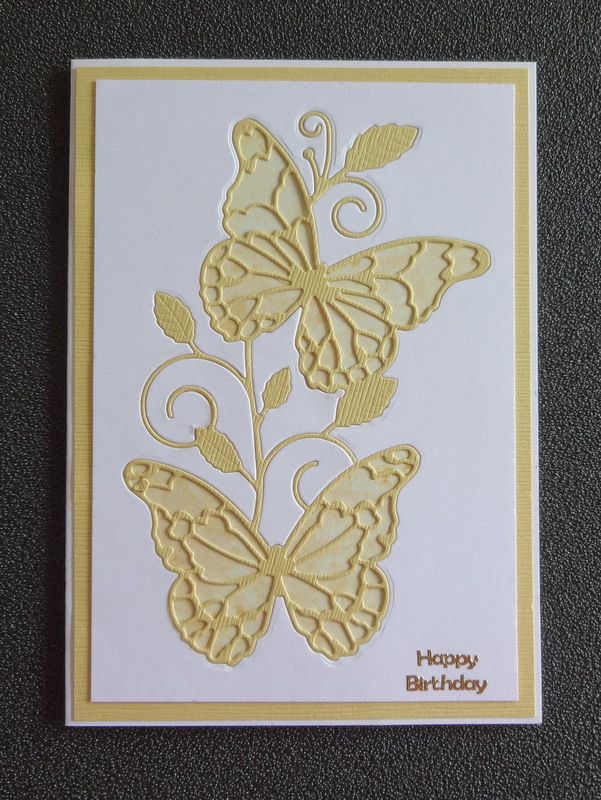
More MB butterflies .... I had this white die-cut leftover from the pink inlaid card I did the other day, so just popped it over the same yellow paper matted onto matching Bazzill.


Then it occurred to me that I could do another inlaid card over the yellow paper, so that was the third one.  But then I had another white die-cut leftover ...... so .....


I had this background already embossed and smooshed over with Distress ink, it does have yellow in the mix ....

That's four cards from a colour I don't really use very much.  Not bad :-)