UFO's, WIP's and NESY's ....... Unfinished Object, Work in Progress, Not Even Started Yet .... we all have them, don't we? I am trying to reduce the pile!
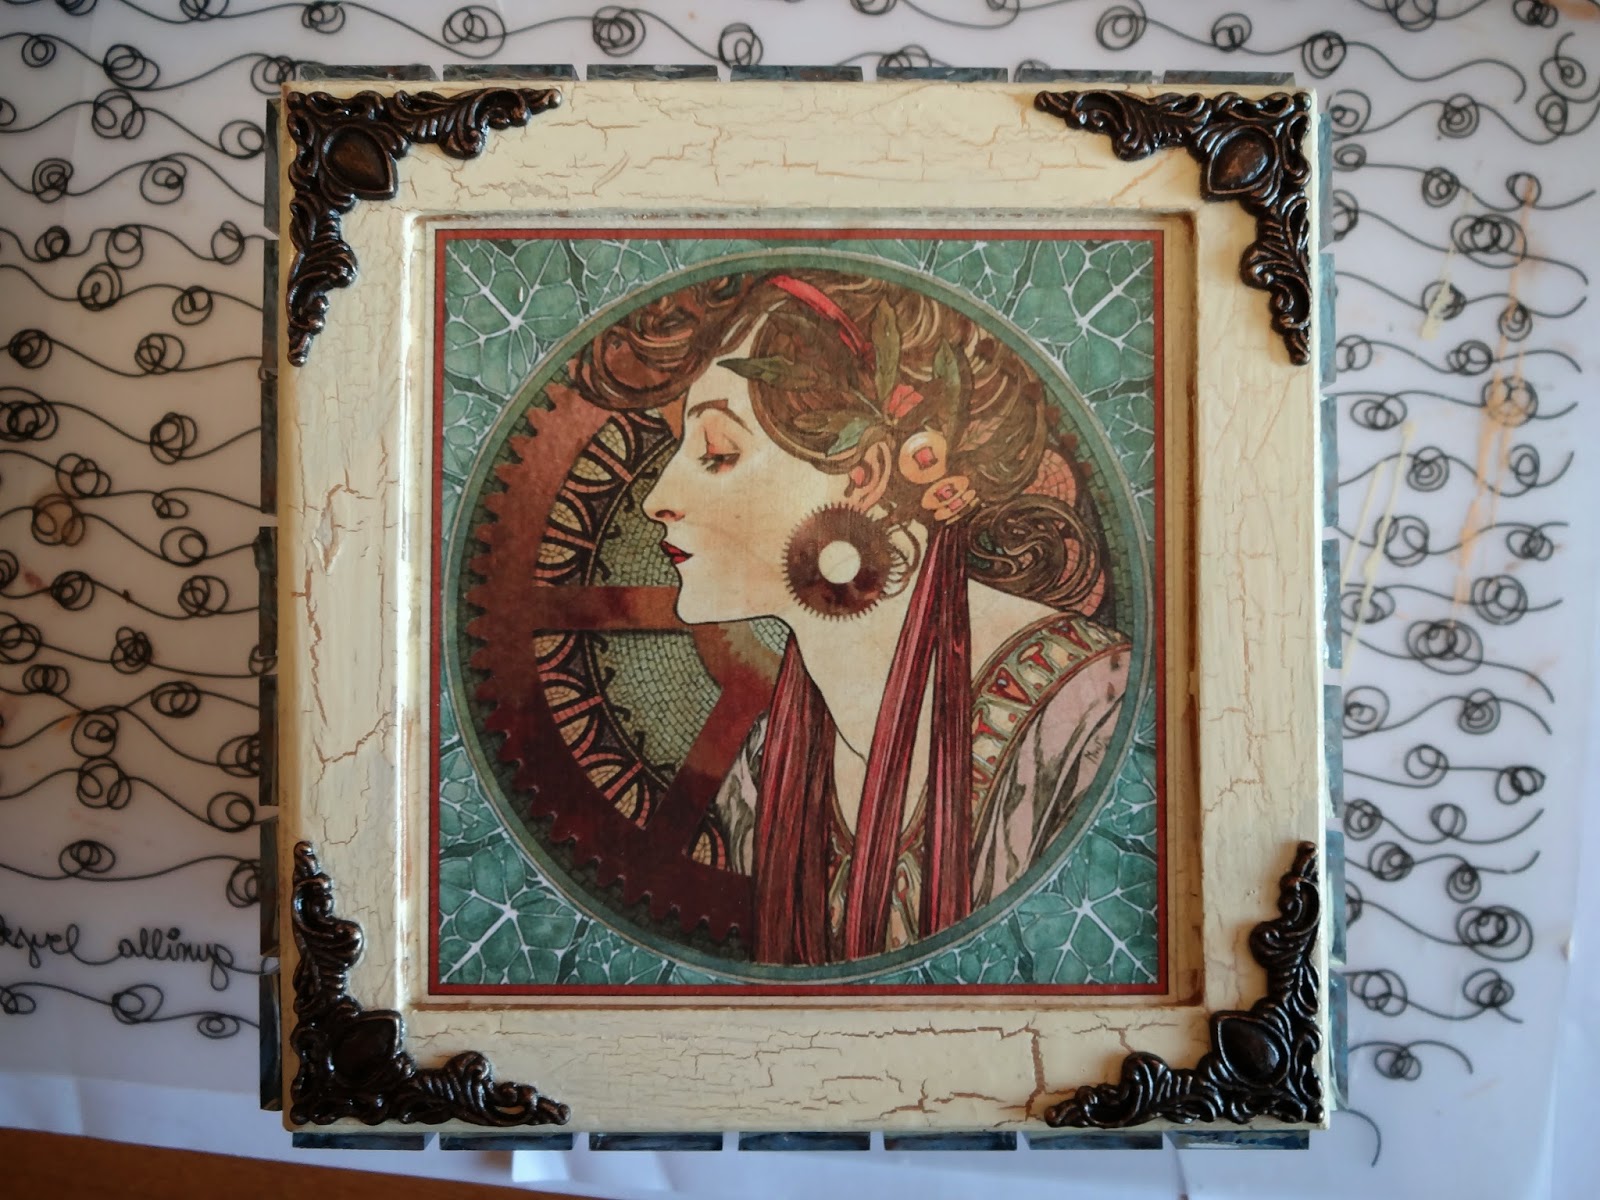
This one is definitely a NESY. I have had this box for three or four years and bought the Graphic 45 sheet of paper two or three years ago, specifically to use this image on the box. I even put the blank box on a shelf so that it was in plain sight and therefore would motivate me to do it! It's been there about a year ..... or so ......
The box after priming
Painted gold as a base colour for the crackle glaze
Crackle glaze applied, left to dry, over-painted with cream
I missed photographing a couple of steps LOL, but here is the box with Venetian paper adhered to it and a gold line on its base. Also the lid with the image, mosaic tiles around the edge and metal corners which have been alcohol inked to colour them.
A close up of the finished box
I am so pleased this is now finally finished - after three years or so of procrastination, it took a week overall, one step every evening after work and then the final bits this weekend. I have put it back on the shelf and am waiting to see when DH notices that it is done ........ :-)
A blog for cooking and crafts
Showing posts with label box. Show all posts
Sunday, 4 May 2014
Monday, 27 February 2012
Treasure Chest for an 8 yr old girl
Little Girl's Big Sister had been admiring my collection of Primark junk jewellery which I buy to pull apart and use as embellishments. She especially liked this key and I asked her if she would like me to make her a treausure box with the key to decorate it. Her eyes lit up, "ooh yes please!" she said :-) That was just before Christmas, and I glimmer misted the box in pink and a bit of purple ........ then put it to one side and promptly forgot about it in all the rush to get Little Girl's album finished.
Yesterday (Sunday) was handover day, and on the Friday before I had remembered the box and realised I had better get on with it, as Big Sister was bound to remember! So I overstamped the box with flourishes in pink stazon and at that point it looked really pretty ........ then I made the fatal mistake of thinking it needed a few darker flourishes. So I over stamped in what I thought would be a slightly darker colour, a purple. Oh dear :-( it was waaaaaaaaaaaaaay too dark, but once I had done one, I had to stamp all over as I had started in the centre, not a nice sensible place like a corner where one dark flourish might have looked OK ..... oh no.
So having ruined it, what to do next??? I had intended to use two or three of the flower cut outs which I had found lurking in a drawer, so instead I decided to cover most of the box with them and hope that the swirly stamping would look like an intentional background LOL. I also punched out some butterflies from some green gingham paper and put a few of those on.
The art of flat decoupage is to make it look as though the printed images are almost painted on, this being achieved by several coats of varnish - the edges of the prints are supposed to disappear ....... well I didn't quite manage the 'perfect' decoupaged surface, but after four coats of varnish I thought ...... that'll do ......!
I put a tiny screw-eye at the end of the box to hang the key on, and that was it! It doesn't look too bad, even though it is so pink and flowery LOL, a shame the light was so bad when I took the photos, it does look better IRL. Big Sister loves it :-)
Thursday, 2 September 2010
Glimmer Misted Box
I started this box several months ago - yes, months! - by glimmer misting a plain wooden treasure chest in Midnight Blue and a bit of Candlelight. Then I stamped a couple of corner swirls with Timber Brown Stazon. It looked OK, but needed something more, and I couldn't think what, so I left it ....... it has been sat on the shelf behind my desk, staring at me accusingly, ever since.
Over the Bank Holiday weekend, I decided to stop procrastinating! I knew I wanted the three mosaic tiles on the front but couldn't decide on the rest of the stamping. Then I remembered some of the stamps I had bought at Ally Pally, a compass and two sizes of pocket watch. Perfect. I stamped them on in Teal Stazon, stuck the mosaics on with Matte Accents and it was done! It took me all of 20 minutes to actually finish this thing that had sat around for months :-)
Wednesday, 14 April 2010
Decorated Box
I have been working on this box for a while, couldn't post about it as it was Sy's bithday pressie! I gave it to her when we met up at Ally Pally, and she opened it at lunchtime - and I missed seeing the look on her face cos she didn't wait for me to get down to the lunch hall!!!!! Ooh, she's a one that girl ........... :-)
The box started out as plain pale wood. I glimmer misted it to within an inch of its life, it actually started as being much redder, but I felt it was too much so browned it down a bit, then put lots of bronze mist over it. The sides were stamped with stazon in brown for a subtle pattern, and I stamped and embossed some corners and a border on the top. When everything had dried, I coated it with an acrylic varnish. Next I put some self adhesive green suede on the base to stop it scratching furniture. I ran some copper metal sheet through my embossing machine for the top panel, stuck it down and then edged it with the mosaic tiles. Last was the flower. The photo - as always! - doesn't do justice to it, the flower is more pearlescent than it appears here and the flash has given a high shine to everything else, where really it is more gleamy than shiny :-)
Now for the inside. I painted with a copper acrylic craft paint, then lined the base with the same green suede. Then I made up the spring roll recipe cards, which I have been promising her for months now LOL, put them onto a book ring and added a tassel.
She liked it :-)
Subscribe to:
Posts (Atom)