A blog for cooking and crafts

Showing posts with label decorated item. Show all posts

Friday, 23 February 2018

Peacock box

I have a huge stash of wooden items to use up and so I decided to decorate a box for Sy's Christmas present - I had forgotten I hadn't blogged it!


I took all the hinges and clasp off the box and put them safe to one side.  Then I primed the box with gesso and painted with a teal paint from Cosmic Shimmer.  The stencilling, which isn't - ahem - quite perfect ...... never mind, was done with silver acrylic paint, I can't remember the brand of stencil.  It wasn't quite wide enough to go over the entire box, but I liked the borders at the side, just needed to find something to give them a 'finished' edge.  A strip - or four - of nailheads did the trick, making certain they would stick permanently by using cosmic shimmer glue on the integral adhesive strip.  A coat of varnish to protect it and left to dry  overnight.
Tine to re-assemble the box.  Now bear in mind that this was the Saturday morning before heading off to the crop where I was going to give the gift.  I dropped the last tiny screw on the floor.  Could I find it?  I had to find another blank box with silver screws and discovered that all of them except one had brass fittings LOL.  I have now bought a whole selection of tiny screws, in various finishes, to make sure that never happens again :-)

Thursday, 11 August 2016

Out of the Drawer: Monochrome letter rack

In 2014, I went to the Merly Impressions retreat and had a wonderful time :-)  This letter rack was one of the included kits - I didn't start it at the retreat, but brought it home 'to do later'.

Two years later...... a lady who had been to the 2016 retreat, posted her beautiful completed letter rack on Facebook and I thought - I really must do mine!  I made a good start, then family bereavement and the resulting issues put a stop to any other thoughts for a while.

Last weekend was my craft weekend, so I decided to make finishing this my priority.  The papers are all Kaisercraft, though I am not sure from which ranges now (having lost the original kit instructions!).  The back surfaces of the dividers, the inside sides and the back of the rack are painted with black acrylic and then sealed with a matte varnish.  The handles are from Tonic Studios, they are brads, so were easy to attach to the greyboard drawers and I really love the effect.


Now all I have to do, is finish the other BTP products I bought in 2014...... plus the one I have just bought ...... before the retreat next year :-)

Tuesday, 14 July 2015

UFO - Ikea drawers

Are you sitting comfortably?
Once upon a time ....... we bought six Ikea Fira drawers.  They hung around for a while, I decorated one as a gift and one for ourselves, leaving four awaiting processing.  They waited ... and waited....

I think they are now around 15 years old, Ikea don't even make them anymore, though they still have a similar item, with different dimensions.  The good news is - I have finished another one!!!


I coloured the wood edges with promarkers and intended to cover the top, sides and drawer fronts with some of my precious Venice paper.  This required two sheets, I only had one of the brown colourway I wanted to use, so had to go for a green pattern instead.  The drawer fronts were fine, but unfortunately the paper is quite delicate and the larger top piece just wouldn't lie flat onto the item, I ended up ruining the paper .  So a swift change of plan was needed ....... I painted the top and sides instead, which meant I could have used the brown paper for the fronts after all LOL.  But I am happy with the green, it has turned quite well :-)

Now to decide what to do with the next one, they are all going to be different LOL.

Sunday, 5 October 2014

Black Sheep of the Family ......

My work colleague gave me this box to 'do something with', so I offered to decorate it to match her newly re-done bedroom.  She gave me a scrap of the curtain fabric to get the colours from, which were white, orange, yellow and green.


I decided to make paper panels for each side and ordered some papers from the Basic Grey 'Spice Market' range, as I thought the colours looked right.  I was going to use one paper over the whole item, but my colleague liked two of them, so I have made the side panels from one design and the front/back panels from another.

I cut and attached the panels, then decided that a gold line border would look good all around.  Sy did her best to dissuade me and I should have listened to her ...... it all went horribly wrong and when I took the lines off, the paper tore in a couple of places.  We made a quick dash to the market haberdashery and bought some fabric roses.  I attached these to the side panels with some pearly swirls and they do look rather nice :-)


I think I would have preferred it with just one paper on all sides, but it's not my bedroom it will be living in!  I will be handing it over tomorrow ... let's hope she likes it :-)

Sunday, 28 September 2014

Steampunk wall art

I haven't blogged since mid July ..... where did August and September go??  A severe lack of mojo combined with (or perhaps because of?) pressure at work meant that I made hardly anything during that time.  Some half completed pages at crops, some half finished cards.... but no real inclination to finish anything.  I have managed to cross stitch for 10 - 15 minutes every day, sitting in my car before work, which has resulted in a couple of finished pieces, more on those tomorrow :-)

The steampunk piece below is a class kit which I started at the Merly Impressions retreat, back in June.  The original class item was this frame, covered with flowers ..... so not really my thing LOL.  I brought it back home with the paper (Kaisercraft, not sure which range) attached to the separate pieces and that's how it stayed for, ahem, a couple of months.  Finally I bit the bullet and put the pieces together, painted the mini frame, found a nice quote from this site, added the keys, the crystals and the other metal bits.  It still needed a little more, so I made an interrupted border from silver nailheads.

Here it is in its final position:


I am very pleased with it :-)  also I have made a great discovery - Cosmic Shimmer glue will stick metal to metal, now that is something which will prove very useful in future!

Sunday, 4 May 2014

NESY - Steampunk Lady decorated box

UFO's, WIP's and NESY's ....... Unfinished Object, Work in Progress, Not Even Started Yet .... we all have them, don't we?  I am trying to reduce the pile! 

This one is definitely a NESY.  I have had this box for three or four years and bought the Graphic 45 sheet of paper two or three years ago, specifically to use this image on the box.  I even put the blank box on a shelf so that it was in plain sight and therefore would motivate me to do it!  It's been there about a year ..... or so ......

The box after priming


Painted gold as a base colour for the crackle glaze


Crackle glaze applied, left to dry, over-painted with cream


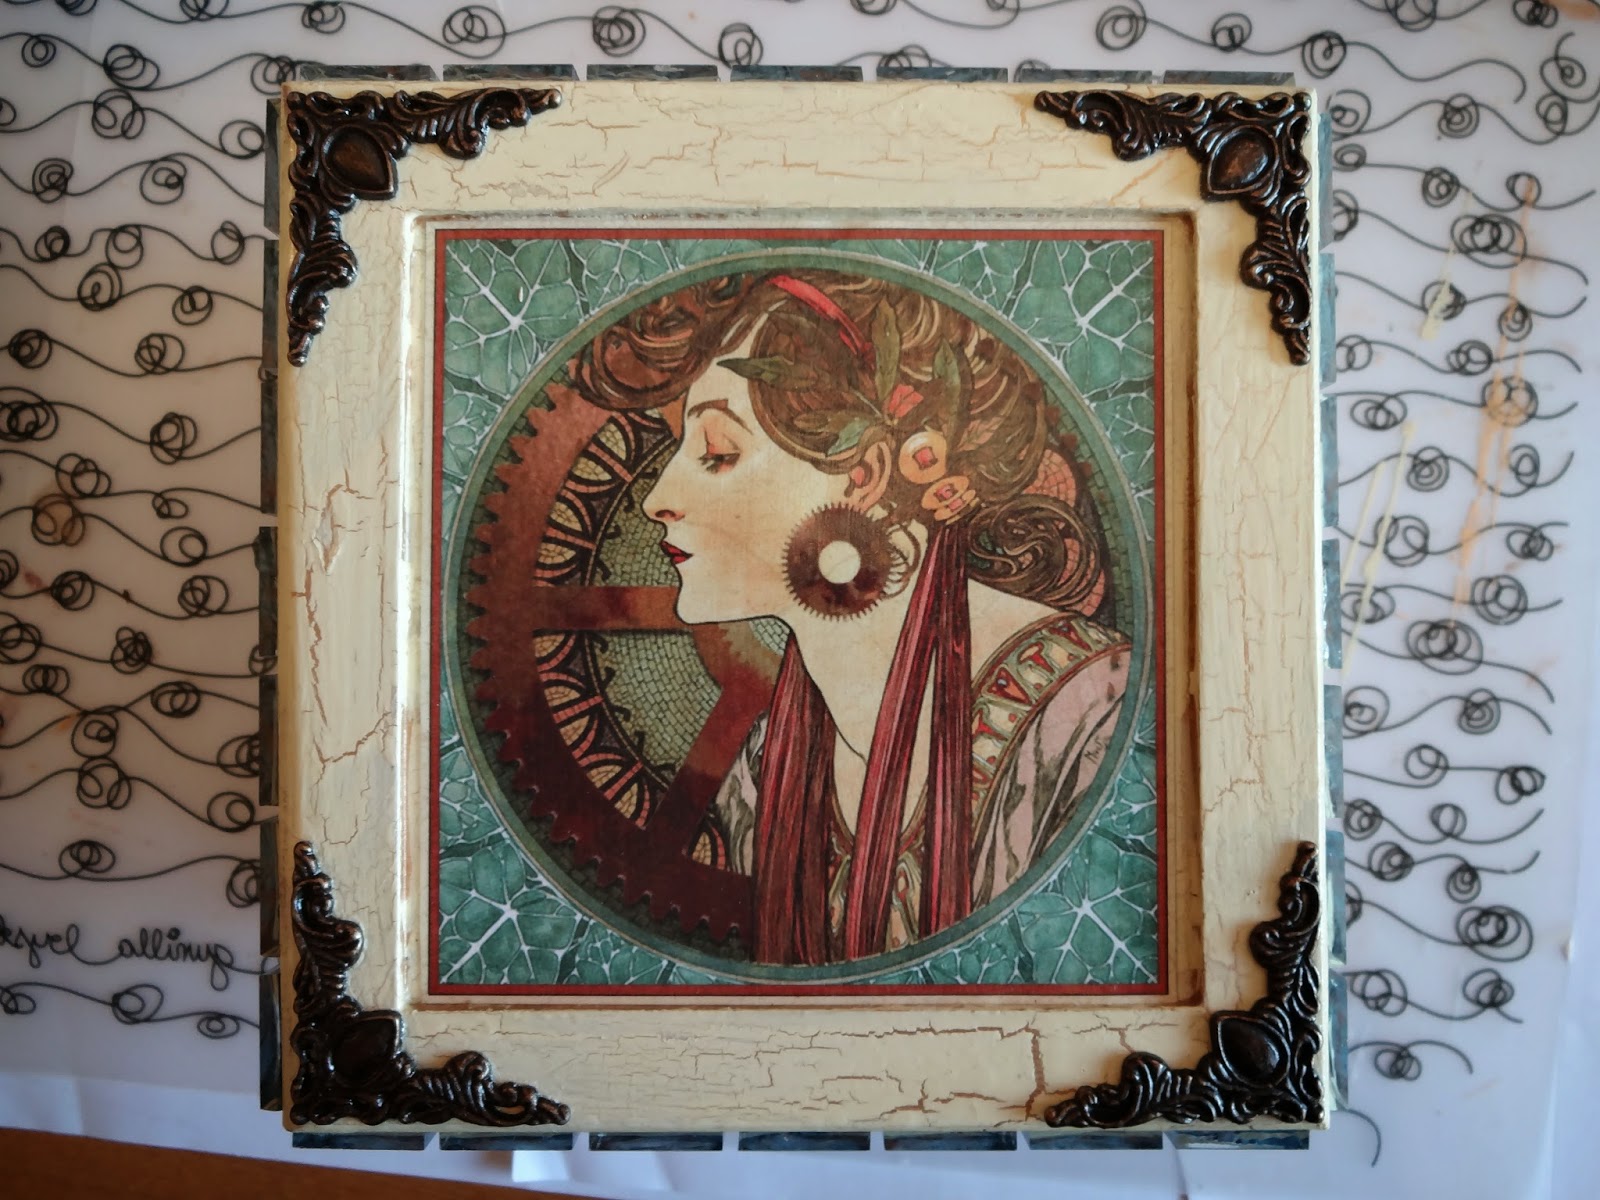
I missed photographing a couple of steps LOL, but here is the box with Venetian paper adhered to it and a gold line on its base.  Also the lid with the image, mosaic tiles around the edge and metal corners which have been alcohol inked to colour them.


A close up of the finished box


I am so pleased this is now finally finished - after three years or so of procrastination, it took a week overall, one step every evening after work and then the final bits this weekend.  I have put it back on the shelf and am waiting to see when DH notices that it is done ........ :-)

Monday, 21 April 2014

Mixed media wall art

I have at times messed around with texture paste, sprays and alcohol inks, but I don't think I have ever intentionally started a full on mixed media piece before.  I had to go and buy some gesso especially :-)  This was inspired by two projects found whilst blog surfing. 
This one from Misteejay:
http://misteejay.blogspot.co.uk/2014/03/sunshine-good-company.html

And this one from Gabrielle Pollacco, which I found via a video link on you tube:
http://gabriellepollacco.blogspot.ca/2014/01/video-tutorial-steampunk-journal-cover.html
the video is well worth watching, not too bad at a shade over 24 minutes, though I did mute the music after a while :-)

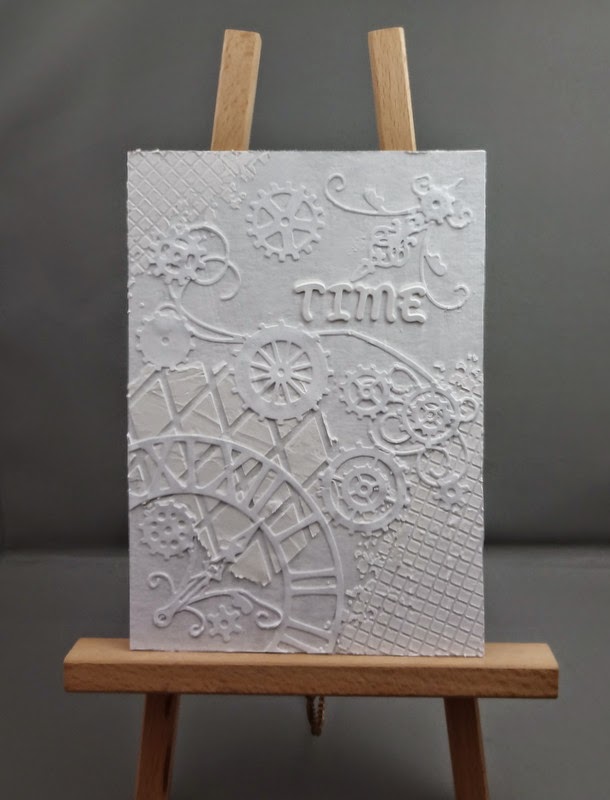
So I started with a piece of greyboard cut to fit a 5 x 7 frame, applied gesso all over it, left to dry.  Then I added texture paste through stencils and adhered various die-cuts and some letter stickers, and gesso'ed all over again.  At which point it looked like this:


Now for colour..... I used spray mists and alcohol inks and water from a mister to make the colours run nicely.  The piece was dried with a heat gun between each colour.  Then I applied Treasure Gold in Classic Gold over the raised die-cuts and some TG in Aquamarine in a few areas.


The frame was a plain wooden one, I painted it with Paperartsy fresco paint in chocolate pudding, then added some copper spray mist over the top, but this made it compete with the artwork too much, so I knocked it down a bit with some Paperartsy matte glaze.  The final touch was to add some metal corners, from 7 Gypsies I think, coloured with alcohol ink.  I also added a few crystals to the gears in the piece.


And there it was done!  I am rather pleased with it and will definitely do some others.  After all, I have a whole tub of gesso to use up ...... :-)
 

Saturday, 5 April 2014

Rescuing a Failed Icon

Some time ago, when I had my huge craft room clear out, I collected all my wooden items (some half done, the rest still blank) together on a shelf .... then filled a couple of boxes too....:-)  This icon is one of the half done items, I had painted both sides burgundy, then sprayed with a reddish purple Glimmer Mist.  So far, so good.  But then I attempted to over-stamp the two inside surfaces and it was a disaster - I put it to one side and waited for inspiration to strike.
A while later ...... months later in fact ...... I picked up the Failed Icon again.  Here it is with the inside surfaces over-painted in cream, which hides the disastrous stamping nicely (took two coats, mind!).


Then I stamped a crackle design all over, which didn't properly take in some places due to the uneven wood surface, but looks OK for the vintage look I was after.


I stamped a selection of gears and swirls around the edges of each side, though I should have thought a bit more carefully about the inks I was using......


I had stamped the balloon image (Prima) and printed out a suitable quote onto the same paper, so I die cut the arch shape for each one, then brushed over with a selection of distress inks.  Then I sealed the whole surface with Mod Podge and at that point some of the inks I had used started to smear.  Luckily I was able to wipe off the excess and it had the effect of softening the whole thing - I would have hated to have another failure!  The quote hasn't come out well in the photo - it says:
"Everything which can be invented, has been invented" 
Charles H. Duell of the US Patent office in 1899.


Then it was time for the front and back.  I had made rosettes, the larger of them has washi tape stuck along the straight edge before folding up, which gives a nice two tone effect.  A pearl swirl connects the two nicely.  The back has some embossed heavy weight paper (Papermania gears embossing folder), though the embossing is softened a little by the varnish I used to protect the piece.  Then I added some laser-cut gears.


The final touch was to add feet - these are actually little drawer knobs meant for a dolls house chest of drawers!  I am so pleased that this is finally finished, I love it :-)

Wednesday, 12 February 2014

Order and Chaos

A while ago, I cleared out my craft room.  Literally.  I took everything out of the room ... then tried to get it all back in!  I gave or threw away a lot of stuff.  I found all sorts of things I had forgotten about, including a large number of wooden items I had bought to "do something with".  These wooden tea light blocks came, I think from the Craft Barn and are made by Artemio.


I primed them, then painted them gold.  Then I applied Paperartsy crackle glaze, left to dry and over-painted with a burgundy acrylic paint.  They stayed like that for a while, I knew I wanted to use texture paste, but didn't have it quite straight in my head as to how I wanted to proceed.  Then I bought the random circles mask and realised that I could use it on one block, with the gridded squares mask on the other block.  And so Order and Chaos came to be ......
I used some Treasure Gold through the stencils once the texture paste had dried, then when that had cured for 24 hours, I used a matt varnish over the whole block - Americana Duraclear Matte varnish, again from the Craft Barn.  It is the best varnish I have found so far for a really matte finish, but it does need to be stirred thoroughly so that all the matting agents are well mixed rather than sunk to the bottom of the container!
I put some green sticky-back felt/baize on the base and they were done.  They are a little more burgundy than they appear in the photo, not quite so red :-)  One wooden item down, 999 to go......