A blog for cooking and crafts

Tuesday 23 July 2013

Arrr! Here be Pirates!


DH is on a canal boat trip this week, together with DS2 and his partner, and DH's sister plus her two girls.  DH decided, a bit too close to the date (!), that a pirate theme would be just the thing :-)  So we ordered some shrink plastic and iron-on fabric transfer paper and waited with fingers crossed that it would arrive in time for us to make something.

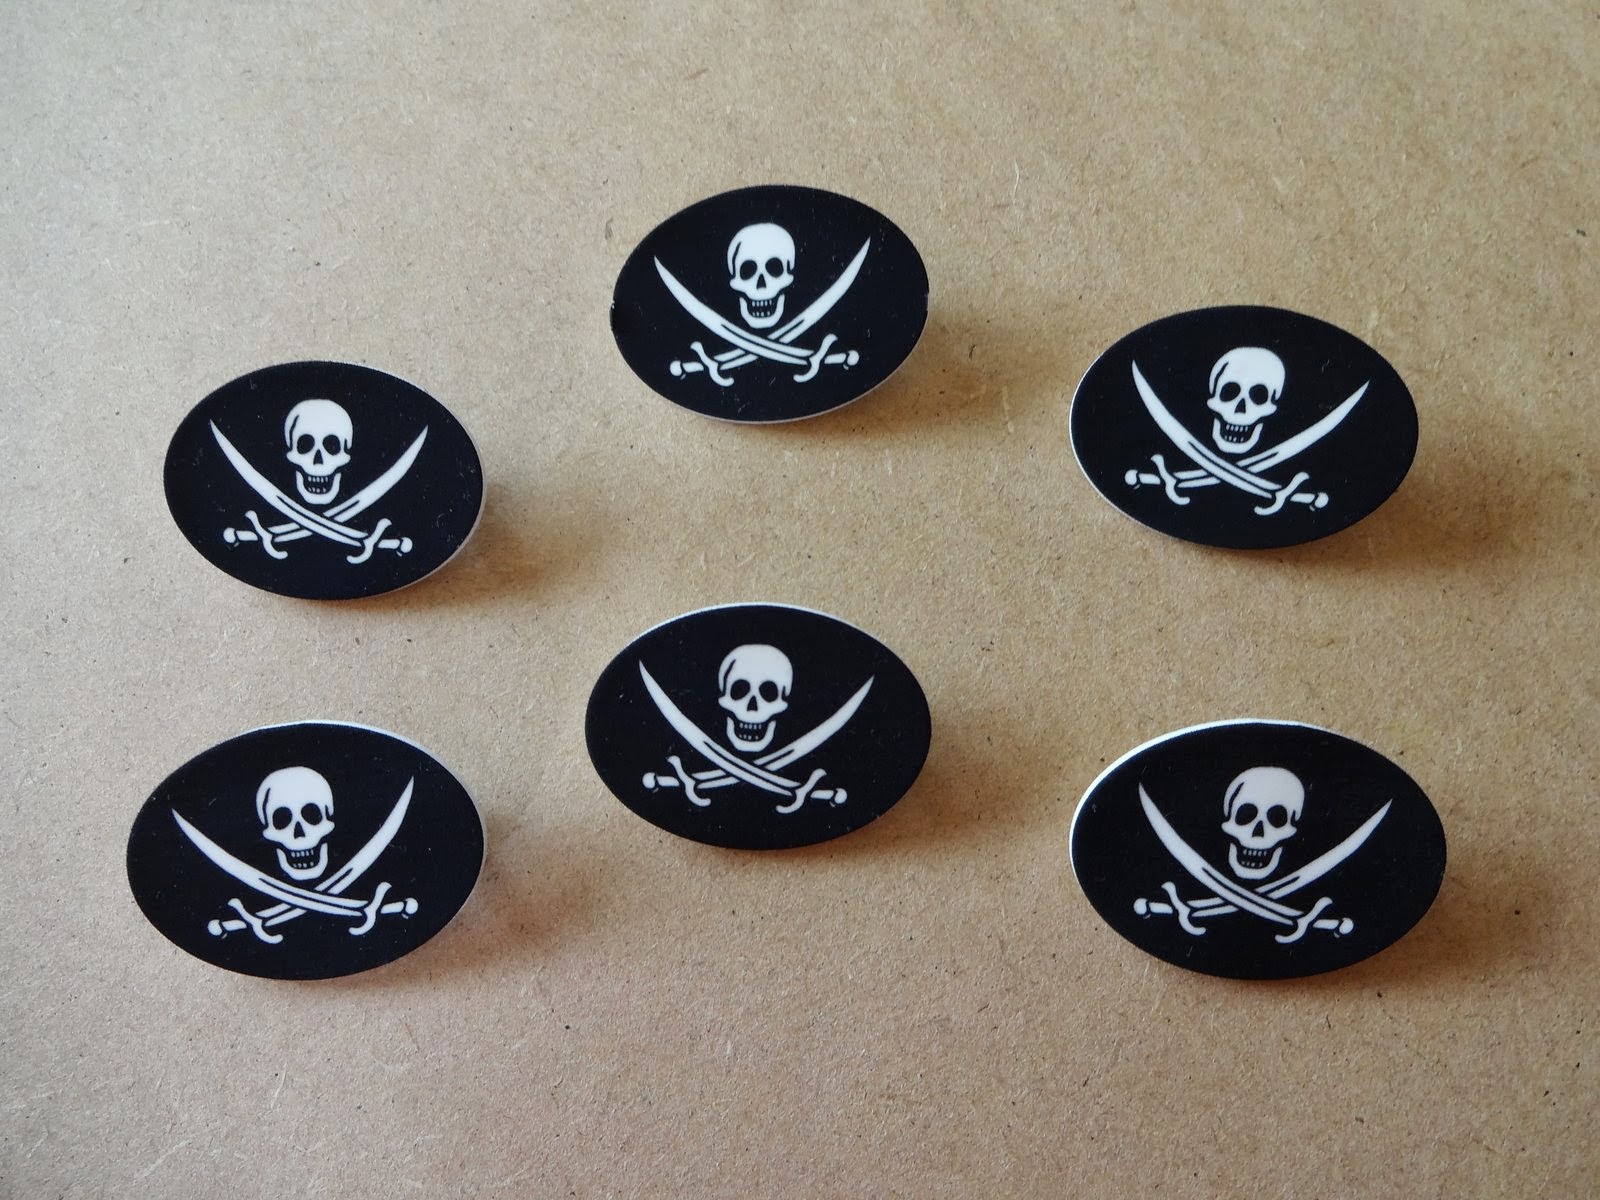
We ended up with two evenings to get it done!  From the shrink plastic, we made these badges - the second photo shows the original size compared to the shrunk piece.  I have never used SP before, will definitely give it another go, I was very impressed.

Next evening, we used the transfer paper for the T-shirts, four of them, here fetchingly modelled by Cap'n Blackbeard himself :-)  Having managed to persuade the craft robo to cut the very fiddly graphic, I left the Cap'n to peel the images from the carrier sheet .... it took a while .... then it was just a matter of ironing them onto the T-shirts.  The result is fabulous, again I have never used this stuff before, but defintely will again.  You do have to be careful to get every little bit ironed though, we had a little trouble with the sword points :-)

I have put in a special request for a photo of the Cap'n and his motley crew, so watch this space for the scrapbook page!
Posted by Picasa

Sunday 21 July 2013

52 cards challenge - week 29


The prompt for week 29 is for a Nordic theme.  I chose to follow Nat's suggestion of a traditional Scandinavian colour scheme of red, white and kraft.

The basic card is the same for both Christmas and anniversary cards - I used a new-to-me card blank style from Craft Creations, a landscape A6 with the fold on the short side rather than the long.  Both then had a white mat and a 'kraft' (actually some stone linen effect card) mat on top.

The anniversary card I kept as a landscape shape, die-cut a flourish and punched a butterfly in the white.  The butterfly actually was punched three times - the base one was cut to fit against the flourish to make an even surface for the second, which formed the 'base' of the 3D butterfly, then the third one was attached down the centre only with red tape so the wings remained free.  A few crystals for the 'body' to finish off, and a peel-off sentiment - an anniversary to make a change from birthday!

The Christmas card I turned to make a tall tent card.  I die-cut the tree in white ..... it's very fiddly to stick down ..... then added crystals and a white peel-off sentiment.

Rather pleased with these - especially the butterfly & flourish combination, will have to do that again :-)
Posted by Picasa

Monday 15 July 2013

52 Cards challenge - week 28


The prompt for week 28 is stripes and a blue/pink colour combo.

The birthday card is done with magazine papers, just a simple mat framed with peel-off lines, two blue stripes and a die-cut flourish.  The butterflies and sentiment tag are punched.

For the Christmas card, well I was stuck on combining the pink and blue - so I ditched the colour scheme altogether!  But it does have stripes LOL.  Again I used magazine papers, the same design more-or-less as the first card, but I had to outline the stripes as well as the mat, they didn't show up well otherwise.  The topper is from the same set of papers, I punched it out and used a scalloped circle punched mat.

Probably not my favourite cards, but they are fine for 'the box' :-)
Posted by Picasa

Sunday 14 July 2013

"Destination & Journey" box framed picture


Inspiration is a funny thing ....... a few weeks ago I had decided that I really should use the texture paste I had bought after Sy had shown me how to use it, so I applied some through a mask to a piece of linen-effect card.  I didn't know what to do next, so left it lying around on my desk. 

Then last Friday evening, it happened that I was doing some blog hopping, with a glass of cider to hand LOL, and was reading the Tando and Craft Barn blogs - both of them had projects involving mists.  So I (or was it the cider?) decided that what that texture-pasted card really needed was some misting!  Off I ran into my craft room and applied some Cosmic Shimmer mist in Patina, blotted with kitchen roll then swiped over the top with a chalk ink pad.  I found the tag, which I made, oh, at least a year ago, but had never found a use for, in my "useful bits" box, together with the embossed piece of cardstock and the die-cut squiggle borders.  Then I spent some time arranging and re-arranging the elements before having the sense to let the misted piece dry overnight :-)

Saturday was spent shopping, siesta-ing, pizza making .... so I didn't get back to it, though ideas were beginning to wander around in my head - I even fell asleep thinking about it!  So today, I set about trying to bring all those random thoughts together.  It was going quite smoothly until I decided that I needed to put a key on, luckily I had only stuck the textured piece to its backing board and not attached the whole thing to the picture!  So I cropadile'd a hole for a brad, then had to find some black chain and jumprings to assemble the dangly bit for the key to hang from ...... After that it was just a matter of die-cutting the piece of embossed card for the side panels, attaching the crystal swirls and the die-cut squiggles, then mounting the tag on foam tape over the top.  I did have to swear a bit as I attached the silver mandala (originally a piece of Primark jewellery!), as it refused to stick and I had to Glossy Accent it to within an inch of its life!

I have photographed it without the glass in front, here are some close ups:


The frame is from Ikea, I think it is called Ribba and it comes in various sizes - I like it because it stands on its flat base so it doesn't need hanging on a wall.  I am very pleased with this, it will be going to a shelf on the landing, but for now it is stood on the dining room table so I can look at it! 

I should also say ....... not all my crafting is cider-assisted....... :-)
Posted by Picasa

Monday 8 July 2013

52 cards challenge - week 27


The prompt for week 27 is "Seasons".  For once, I knew straightaway what I was going to use, but then the bulb in my daylight lamp blew and I had to wait days for a replacement!  So I am uploading at the last minute, yet again :-)

The birthday card uses a stamp set from Hero Arts - I embossed onto a coppery brown cardstock using a white detail embossing powder, punched out the images separately and matted them onto a stone linen-effect cardstock.  I was a bit stuck then as to where the sentiment should go ..... the words on their own looked a little lost in the centre, so I used a line to anchor them and rather like the effect :-)  The corners of the mat are done with a south-west corner punch for a bit of extra detail.

I used the same colour combination on the Christmas card.  The seasonal scene is from Scrollworks, who are sadly now defunct, I believe.  I rounded the top corners of the mats and card blank to echo the shape of the stamp, then got very daring - I used my new paper pricking ruler around the edge of the white mat!!!  It doesn't look too bad, though I will admit that the punched snowflakes are very .... let's say .... strategically placed!  I added a punched snowflake border and ribbon at the base and put some faux nailheads onto the snowflakes.
Posted by Picasa

Wednesday 3 July 2013

Infernal Machine


Last year, DH and DS1 built a 3-D printer and here it is in operation for the first time.

This is a very busy page for me!  It took quite a long time to finish as I kept going back and adding more bits - I started it in November last year - and I have only just managed to do the jurnalling :-)  A combination of steampunk papers from Prima, Bo Bunny, Craft Creations and Graphic 45 make up the layers, the gears are Nestie die-cuts, the chain is an EK success punch.  I stmaped the title letters and matted them onto small punched circles, put them on the page using foam pads.
The journalling is done on safmat, which I then stuck to some Craft Creations swirly paper and die-cut using a Go-Kreate die.
DS1 is quite impressed with this page :-)
Posted by Picasa

Monday 1 July 2013

Beat the Christmas Rush - June


I made this card a little while ago for the 52 cards challenge and liked it so much, I have made four more for BtCR June!
The background aqua cardstock was run through the Bigshot in a snowflake embossing folder.  Then I die-cut the branch (Marianne) and the baubles (Memory Box) and assembled the card using a bought sentiment banner.  Nice and simple :-)
Posted by Picasa