In March 2018, my lovely sister got married. It was a beautiful wedding and I have lots of amazing photos to put in pocket pages in my 2018 scrapbook. But I wanted to do some special pages with single photos, so it has taken me some time to come up with an idea I was happy with. The first page is the happy couple and the second is the complete family - my sister, new brother in law and my nieces and nephew.
Both are loosely based on a couple of Pinterest sketches, here and here. The titles were die-cut, the heart circle was cut on the Silhouette in two different cardstocks, the border under the photo on layout 1 was punched, the flowers and the cogs were die-cut. Flowers.....? Me...? Well, I love my sister, she can have flowers for her wedding day .... LOL.
I am so pleased with these, I wanted the pages to really do the photos justice and I think they do :-)
A blog for cooking and crafts
Showing posts with label punches. Show all posts
Monday, 2 September 2019
Friday, 9 November 2018
Retreat Layouts 1
I got seven layouts completed and a few more partially done at the ADTML retreat. I hadn't actually scrapped since the previous retreat last April, but it was like meeting up with an old friend, I just took up where we left off!
Here are two:
The photos have come out a little dark! Silver Birch has a beautiful background paper which didn't really need much adding to it. I used this sketch from Pinterest, the banners and long strip are punched, the doily is die-cut, as is the title. It is also straight in real life, not as wonky as it looks, I swear!
The Mad Hatters also lets the background paper do most of the work. I punched out two different Martha Stewart snowflakes, several times, to make a flurry. The journalling and date tags at the side of the photo were supposed to be done with a label punch, halved - until I discovered I hadn't packed it! But in my die folder I had the nestabilities labels four set and it was perfect. The title is die-cut.
Here are two:
The photos have come out a little dark! Silver Birch has a beautiful background paper which didn't really need much adding to it. I used this sketch from Pinterest, the banners and long strip are punched, the doily is die-cut, as is the title. It is also straight in real life, not as wonky as it looks, I swear!
The Mad Hatters also lets the background paper do most of the work. I punched out two different Martha Stewart snowflakes, several times, to make a flurry. The journalling and date tags at the side of the photo were supposed to be done with a label punch, halved - until I discovered I hadn't packed it! But in my die folder I had the nestabilities labels four set and it was perfect. The title is die-cut.
Sunday, 29 July 2018
Beat the Christmas rush - July
For the last couple of months, I had half-done several cards for this challenge, but not finished them. So in July I have had an almighty catch up, resulting in four sets of five cards!! The photo shows one from each set, with two white hexagons as they had different sentiments.
To make the hexagons, I used a 6" square blank and a Sizzix hexagon die, with the folded edge of the original blank just inside the cutting edge. I also went a bit mirri-tastic!! As always, it doesn't photograph well.....
The white hexagons have a holly wreath die from Tonic, cut in silver mirri, a hexagon frame (Card Making Magic) which is a two piece swirly bit and stitched outline. The sentiment on the left is from an old set, I have no idea which brand and the right hand one is from Stamping all Day. Both were stamped/heat embossed with Wow apple red powder. Just a few 5mm red pearls for the wreath to finish it off.
The ivory hexagons have die-cut gold mirri - the same hex frame, a gift die from Tonic and the sentiment a tiny peel off.
The Scandi hexagons have a huge die-cut snowflake (Kaisercraft) and the same round sentiment as the white, but this time I punched out the centre to make a sentiment polo LOL. I really like it and plan to make some more little polos in different colours :-)
Finally, the A6 card has a background done by inking through an aperture, over stamping with the tree and sentiment from SU.
To make the hexagons, I used a 6" square blank and a Sizzix hexagon die, with the folded edge of the original blank just inside the cutting edge. I also went a bit mirri-tastic!! As always, it doesn't photograph well.....
The white hexagons have a holly wreath die from Tonic, cut in silver mirri, a hexagon frame (Card Making Magic) which is a two piece swirly bit and stitched outline. The sentiment on the left is from an old set, I have no idea which brand and the right hand one is from Stamping all Day. Both were stamped/heat embossed with Wow apple red powder. Just a few 5mm red pearls for the wreath to finish it off.
The ivory hexagons have die-cut gold mirri - the same hex frame, a gift die from Tonic and the sentiment a tiny peel off.
The Scandi hexagons have a huge die-cut snowflake (Kaisercraft) and the same round sentiment as the white, but this time I punched out the centre to make a sentiment polo LOL. I really like it and plan to make some more little polos in different colours :-)
Finally, the A6 card has a background done by inking through an aperture, over stamping with the tree and sentiment from SU.
Sunday, 21 January 2018
Beat the Christmas Rush 2018
Sue is running Beat the Christmas Rush over UK Scrappers this year. Five cards a month and by the end of October, you'll have fifty! You can miss a month and jump back in the next month, it's up to you.
Here are my five for January:
You may notice there are actually six! - I made these at a crop and I happened to have six of this particular colour of card blank with me, seemed a shame not to use them all :-)
The papers are from a Sara Davis 6" paper pad and the large sentiment die is from Memory Box. The snowflakes are made with a Martha Stewart punch. Initially I just had the sentiment, but it just seemed to need a little something more, hence the snowflakes :-)
Here are my five for January:
You may notice there are actually six! - I made these at a crop and I happened to have six of this particular colour of card blank with me, seemed a shame not to use them all :-)
The papers are from a Sara Davis 6" paper pad and the large sentiment die is from Memory Box. The snowflakes are made with a Martha Stewart punch. Initially I just had the sentiment, but it just seemed to need a little something more, hence the snowflakes :-)
Tuesday, 9 January 2018
2018 card challenge - January
Kool Kitty Nat is running a card challenge this year, with a monthly theme and a goal to use old and new stash. Which goes very well with my own Buy it - Try it and Out of the Drawer :-) January is 'Fancy Words', where the sentiment or other text is the focus.
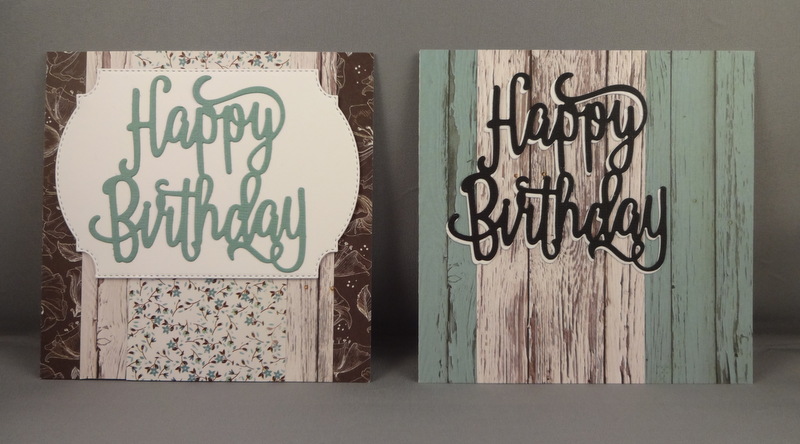
I used a 6.5 paper pad from Kaisercraft, Sea Breeze I think, as the 'old' element and the large HB die from SU is the 'new'. The other sentiments are also SU and are stamped/embossed in metallic Teal from American Crafts.
Sunday, 7 January 2018
Wall art Christmas presents
Now the pressies have been given, I can share :-)
The brief was 'flowers and blue', 'unicorns' and 'cats'. I found some dies in the Hobbycraft sale, 'Intricut' which I had not seen before, but they had a unicorn and a cat (and a couple of others...!) so it was worth a try :-) The packaging states that they may need a shim - there is no 'may' about it, they do! Three passes through the machine and finally I had my cat and unicorn. The background papers are from Craft Creations and the white box frames are from The Range.
A word here about Stick It die cutting adhesive sheets - I loved this product when it came out three years ago, but it seems to have some real quality issues now - I used it because the dies are so intricate, but they wouldn't stick to the background paper. I had to run over the back with Herma repo adhesive, the Stick It did at least stabilise the die-cuts so that the Herma didn't distort them, but I am very disappointed, this was exactly what it is supposed to be used for, but it just didn't work. I'm sure it was stickier when it was first released.
The flowers are done with an SU stamp and matching punch. Each one has three separate layers, so that was 27 flowers stamped, punched and coloured!! Not counting the test ones LOL. The centres are pale green Card Candi. I had a devil of a job getting the grid right, but it came out OK in the end! The frame is a Ribba from Ikea, it's a 9" box frame, my intended 8" frame was just too small to get the 3 x 3 grid.
The brief was 'flowers and blue', 'unicorns' and 'cats'. I found some dies in the Hobbycraft sale, 'Intricut' which I had not seen before, but they had a unicorn and a cat (and a couple of others...!) so it was worth a try :-) The packaging states that they may need a shim - there is no 'may' about it, they do! Three passes through the machine and finally I had my cat and unicorn. The background papers are from Craft Creations and the white box frames are from The Range.
A word here about Stick It die cutting adhesive sheets - I loved this product when it came out three years ago, but it seems to have some real quality issues now - I used it because the dies are so intricate, but they wouldn't stick to the background paper. I had to run over the back with Herma repo adhesive, the Stick It did at least stabilise the die-cuts so that the Herma didn't distort them, but I am very disappointed, this was exactly what it is supposed to be used for, but it just didn't work. I'm sure it was stickier when it was first released.
The flowers are done with an SU stamp and matching punch. Each one has three separate layers, so that was 27 flowers stamped, punched and coloured!! Not counting the test ones LOL. The centres are pale green Card Candi. I had a devil of a job getting the grid right, but it came out OK in the end! The frame is a Ribba from Ikea, it's a 9" box frame, my intended 8" frame was just too small to get the 3 x 3 grid.
Wednesday, 15 November 2017
UK Scrappers Christmas Countdown Day 15
Today I am taking part in the UKS Christmas Countdown :-) Some lovely projects posted so far!
This gingerbread men screen card is not very complicated to make and looks very effective. It can be customised to fit your own border punch, or done to standard measurements - this one is customised. A sheet of 12 x 12 will make two blanks. All measurements in inches :-)
Customised measurements and method:
- Cut a 12 x 12 sheets of cardstock into two 6 x 12 strips
- Punch along the top edge with your chosen border punch
- Count the pattern repeats on the border
- Work out the nearest number divisible by four - this punch made 34 repeats, so the number needed is 32
- Cut off the extra repeats and score three times at equal distances along the card - so in this case that's every eight repeats
- Use a bracket-type punch to make the 'legs' by using the top half only to punch at the base of the card, centrally in each section
- Cut four panels of patterned paper to fit
- Die cut letters and gingerbread men and assemble
Standard measurements and method:
- Cut the strips to 11 x 6
- Punch along the top
- Score at 2.75, 5.5 and 8.25
- Continue as above
The standard method is obviously quicker, it's just that I like my pattern repeats to line up with the score lines ..... LOL.
The paper is from Craft Creations, the letters are from Die-namics (stitched alpha), the gingerbread man is from Tonic and the punch is from Stampin' Up.
Sunday, 12 November 2017
50th birthday card
I made this for a work colleague, we presented it yesterday so now I can share :-)
The blank card was cut on the Silhouette, I used this file from Craftsuprint. It has the card base, a mat and the numbers, all can be cut from a sheet of A4 - I cut the base twice in purple and the mat and numbers in white.
I cut one base in half and embossed it with a folder - I could have just embossed half the main base, but a lot of people had to sign the inside, which would have been difficult on a debossed surface! Then the embossed half-base was attached to the main one.
The numbers were also embossed and then inked with distress inks in purple, teal and pink. I attached them to the white mat and then the whole topper to the card.
Then I was a bit stuck - part of the brief was butterflies, but I couldn't find a butterfly die which looked right, perched on the 50. But whilst looking through the box, I came across the champagne glass and pearly trail, which were perfect. They were die cut in Bazzill Diamond Bling and the small butterflies were punched to match. A few pearls and it was done.
I am very pleased with this - she couldn't open all her cards at the party so I hope she is pleased too .... I'll find out tomorrow :-)
The blank card was cut on the Silhouette, I used this file from Craftsuprint. It has the card base, a mat and the numbers, all can be cut from a sheet of A4 - I cut the base twice in purple and the mat and numbers in white.
I cut one base in half and embossed it with a folder - I could have just embossed half the main base, but a lot of people had to sign the inside, which would have been difficult on a debossed surface! Then the embossed half-base was attached to the main one.
The numbers were also embossed and then inked with distress inks in purple, teal and pink. I attached them to the white mat and then the whole topper to the card.
Then I was a bit stuck - part of the brief was butterflies, but I couldn't find a butterfly die which looked right, perched on the 50. But whilst looking through the box, I came across the champagne glass and pearly trail, which were perfect. They were die cut in Bazzill Diamond Bling and the small butterflies were punched to match. A few pearls and it was done.
I am very pleased with this - she couldn't open all her cards at the party so I hope she is pleased too .... I'll find out tomorrow :-)
Sunday, 15 October 2017
Out of the Drawer - embossed pink birthday card
I have an large number of embossing folders - time to do something with them!
I made a lot of different embossed backgrounds and inked them up with various distress inks. They were cut to fit, adhered to the card blank .... but then what? I do always have trouble covering up backgrounds LOL.
So this is what I came up with.
I stamped the flower (SU) three times, coloured and punched out. Then they were layered onto the card, the first flat to the background, the second with 1 mm foam tape and the third on 2 mm tape. I die-cut the banner and stamped the sentiment onto it. The original embossing folder was (I think) from Taylored Expressions.
It is a bit pink for me ..... but a perfect addition to The Box :-)
I made a lot of different embossed backgrounds and inked them up with various distress inks. They were cut to fit, adhered to the card blank .... but then what? I do always have trouble covering up backgrounds LOL.
So this is what I came up with.
I stamped the flower (SU) three times, coloured and punched out. Then they were layered onto the card, the first flat to the background, the second with 1 mm foam tape and the third on 2 mm tape. I die-cut the banner and stamped the sentiment onto it. The original embossing folder was (I think) from Taylored Expressions.
It is a bit pink for me ..... but a perfect addition to The Box :-)
Friday, 13 October 2017
Venice layout
Another layout done at the Merly retreat. The kit was supposed to be used for a triple photo frame, but the papers fit a photo I had brought with me so well, I went with that instead and the frame awaits another day .... :-)
The Kaisercraft paper collection is Indigo Skies. The title is cut with SU dies, I also used a KC harlequin die for some detail, it doesn't show very well in the photo. The punched edge is a PATP set from Martha Stewart. To finish I scattered a few pearls in blue and yellow to match the costumes in the photo.
Sunday, 8 October 2017
Vienna layout
Another layout! This one was done at the Merly Impressions retreat, back in July. Chrissy's original design involves much more fussy cutting, but I find that hurts my hands so I simplified it :-)
The Wiener Riesenrad is the oldest ferris wheel in Europe and was restored to fully working condition a few years ago. I had never been on one, it was an interesting experience and the views were amazing!
The papers are from Kaisercraft as is the circles die. I cut the gears from a selection of my own dies and the letters are done with an SU die set. For the mats under the photos I used a punch around the page set by Martha Stewart.
The Wiener Riesenrad is the oldest ferris wheel in Europe and was restored to fully working condition a few years ago. I had never been on one, it was an interesting experience and the views were amazing!
The papers are from Kaisercraft as is the circles die. I cut the gears from a selection of my own dies and the letters are done with an SU die set. For the mats under the photos I used a punch around the page set by Martha Stewart.
Monday, 25 September 2017
Buy it - Try it: Daisy & border birthday card
I used my new SU daisy stamp and punch set to start off this card, together with a Kaisercraft texture stamp and a sentiment banner. But it was just a bit too CAS for me, I felt it needed something else.
Fast forward a couple of weeks and I had bought some new Kaisercraft dies at the Merly Impressions retreat. My trial cut of this border die happened to be a nice green from my scraps tray ......
...... and I realised it was the perfect addition to this card!
The daisy was stamped and punched three times, coloured with three SU pink pens, and layered up, with the centre coloured yellow. I used the same pens to 'ink' up the texture stamp and sentiment, then cut out the stamped image, and die-cut a banner.
I like the layout of this card, think I will try it with an embossed panel in place of the texture stamp next time.
Fast forward a couple of weeks and I had bought some new Kaisercraft dies at the Merly Impressions retreat. My trial cut of this border die happened to be a nice green from my scraps tray ......
...... and I realised it was the perfect addition to this card!
The daisy was stamped and punched three times, coloured with three SU pink pens, and layered up, with the centre coloured yellow. I used the same pens to 'ink' up the texture stamp and sentiment, then cut out the stamped image, and die-cut a banner.
I like the layout of this card, think I will try it with an embossed panel in place of the texture stamp next time.
Saturday, 9 September 2017
Out of the Drawer: Snowflake Christmas cards
This Stampendous stamp set and matching dies came out a couple of years ago, I saw it and thought well that's OK, but I won't bother with it. Fast forward a few months and I see a card on Pinterest and decide that actually I would rather like the sets after all! But you know how fast everything is released and then disappears nowadays...... I couldn't find it anywhere. In the end I got the stamps from a UK company and the dies from the US, via Amazon.
So what happened next ....? Yes you guessed it, they went into the drawer and have never been christened, even though I went to such lengths to get them!!
Tine to put that right:-)
There are two small and one large snowflakes in the set and I used the smaller ones, in two colourways. However I found that one of them was more difficult to die-cut as the die obscured most of the stamping and it was very difficult to position accurately. The gold snowflake on the right was my third attempt, I then switched to the other one which is much easier to cut!
For the blue cards, I stamped/embossed the snowflakes in silver and blue, plus a sentiment (Stampin' Up). The paper is from Craft Creations, matted onto silver mirri.
The gold snowflakes and sentiment are also heat embossed and the paper is from Teresa Collins, matted onto a nice dull gold.
I made five gold and six blue - it would have been six gold but I messed up the stamping of the sixth snowflake and I was a bit fed up with them all by that point LOL. I also discovered that my 4" card blanks were actually not square, so I had to trim all my carefully cut mats to fit! I have since cut down the entire pack so that they are all square, otherwise I can't use any square dies without them looking wrong! Thank you, Card Crafts UK ......
I ma very pleased with how they have turned out, that's eleven more for the box :-)
So what happened next ....? Yes you guessed it, they went into the drawer and have never been christened, even though I went to such lengths to get them!!
Tine to put that right:-)
There are two small and one large snowflakes in the set and I used the smaller ones, in two colourways. However I found that one of them was more difficult to die-cut as the die obscured most of the stamping and it was very difficult to position accurately. The gold snowflake on the right was my third attempt, I then switched to the other one which is much easier to cut!
For the blue cards, I stamped/embossed the snowflakes in silver and blue, plus a sentiment (Stampin' Up). The paper is from Craft Creations, matted onto silver mirri.
The gold snowflakes and sentiment are also heat embossed and the paper is from Teresa Collins, matted onto a nice dull gold.
I made five gold and six blue - it would have been six gold but I messed up the stamping of the sixth snowflake and I was a bit fed up with them all by that point LOL. I also discovered that my 4" card blanks were actually not square, so I had to trim all my carefully cut mats to fit! I have since cut down the entire pack so that they are all square, otherwise I can't use any square dies without them looking wrong! Thank you, Card Crafts UK ......
I ma very pleased with how they have turned out, that's eleven more for the box :-)
Monday, 19 June 2017
Christmas screen cards
I have been playing around with border punches to make some more screen cards - the original post with instructions is here. They are very difficult to photograph so the full effect can be seen, but these are my best attempts!
The paper is from Craft Creations, the snowflake dies are Memory Box and the border punch is Martha Stewart. The border didn't have a neat 'end' so I cut to a pleasing shape :-)
Wednesday, 31 May 2017
Pinspired - Stable Door birthday card
There's probably a more correct name for this - but to me it's a stable door! The original Pin is here.
Quite tricky to photograph so the full effect can be seen!
I cut an A4 piece of cardstock in half lengthwise, scored at the centre and then carefully cut the top half of the card front off. Then I used some paper from a 6" pad for the inside and the front, being careful to line up the design so both panels matched.
The flowers are from SU, stamped and punched out. The card actually sat in my 'to be finished' box for a while, because I couldn't find a stamp which felt right for the sentiment. Obviously I don't have enough sentiments, after 24 years of stamping....... Hah!!! Then I was having a bit of a sort out and came across this Woodware one, there are two big stamps in the set and this one looked best. It's now permanently in the stamp bags which comes to every crop with me - can't believe I had forgotten about it!
I really like this, it's a little different and I think it could be adapted quite easily to masculine cards - I'm sure I have just a few cogs and gears stamps just lying around...... LOL.
Quite tricky to photograph so the full effect can be seen!
I cut an A4 piece of cardstock in half lengthwise, scored at the centre and then carefully cut the top half of the card front off. Then I used some paper from a 6" pad for the inside and the front, being careful to line up the design so both panels matched.
The flowers are from SU, stamped and punched out. The card actually sat in my 'to be finished' box for a while, because I couldn't find a stamp which felt right for the sentiment. Obviously I don't have enough sentiments, after 24 years of stamping....... Hah!!! Then I was having a bit of a sort out and came across this Woodware one, there are two big stamps in the set and this one looked best. It's now permanently in the stamp bags which comes to every crop with me - can't believe I had forgotten about it!
I really like this, it's a little different and I think it could be adapted quite easily to masculine cards - I'm sure I have just a few cogs and gears stamps just lying around...... LOL.
Friday, 21 April 2017
Out of the Drawer: lattice stencil flower birthday card
Still haven't managed to photograph any retreat stuff.... we had visitors over Easter so no crafting! Good time had by all :-)
I did manage to finish another Distress oxide stencilled image into a card though.
The OotD item is the lattice die, from Tonic. It's not a complete lattice, the centre is a blank circle, which actually, I didn't like when I originally tried it and so haven't used it since. Then it occurred to me that I could cover it up ...... duh. So I die cut the stencilled flower (Clarity stencil) into the outer square shape, then trimmed it into a diagonal sash to cover the centre. I'm not quite happy with the finish on the stencilling, I used a proper stencil brush, but blending foam pads would have worked better - for the next background I made (not completed into a card yet), I tried those and the colours are much more dense and chalky.
Some aqua/silver paper for the background, also cut with the outer square, then everything was layered up. All it needed then was the sentiment, I used an SU punch and a peel-off.
I do like the die used in this way and will definitely try it again :-)
I did manage to finish another Distress oxide stencilled image into a card though.
The OotD item is the lattice die, from Tonic. It's not a complete lattice, the centre is a blank circle, which actually, I didn't like when I originally tried it and so haven't used it since. Then it occurred to me that I could cover it up ...... duh. So I die cut the stencilled flower (Clarity stencil) into the outer square shape, then trimmed it into a diagonal sash to cover the centre. I'm not quite happy with the finish on the stencilling, I used a proper stencil brush, but blending foam pads would have worked better - for the next background I made (not completed into a card yet), I tried those and the colours are much more dense and chalky.
Some aqua/silver paper for the background, also cut with the outer square, then everything was layered up. All it needed then was the sentiment, I used an SU punch and a peel-off.
I do like the die used in this way and will definitely try it again :-)
Monday, 6 March 2017
Buy it - Try it: Vertical Greetings stamp set
Another couple of cards made by using water colour markers to colour the stamp instead of ink. The stamps set is from SU - Vertical Greetings.
I was very pleased with the three identical panels on this one, until I realised that I had left no room for a sentiment!!! So I improvised with a tiny stamp, punched out into a small scalloped circle.
Second attempt - I used the vertical sentiment from the set on the centre panel and I like the overall effect much better :-)
I was very pleased with the three identical panels on this one, until I realised that I had left no room for a sentiment!!! So I improvised with a tiny stamp, punched out into a small scalloped circle.
Second attempt - I used the vertical sentiment from the set on the centre panel and I like the overall effect much better :-)
Wednesday, 1 March 2017
Pin-spired Wednesday - Screen card
I have been meaning to try this style of card for ages, then someone at the Chailey workshop (contact nickyalevy@btinternet.com ) had a decoupage kit with a ready cut screen card in it, so I just had to make one myself :-) I have a few of these Pinned, one example is here. The effect can be varied with your choice of border punch and the whole card folds up to fit in a standard 6 x 4 envelope.
I had previously made a couple of blanks as practice, but not decorated them. The paper is from an Authentique 6" paper pad which I had in my tote, and the flowers are SU punches, as is the bracket punch used to make the 'legs'. The border is a Fiskars punch.
Now there is a standard way to make these, but I have customised mine :-) The standard method is to cut a strip 11" x 6", border punch along one edge, then score at 2.75 inches, then at 5.5 and 8.25. Use the bracket punch at the base of each panel, but line up the card inside it so it only punches half of itself.
But .... I like the pattern repeats of the border to 'line up' with the scoring .... not that I'm obsessive or anything .... LOL. So I customised it. I cut a 12 x 12" cardstock sheet into two 12 x 6" strips. Use the border punch as before. Then count the pattern repeats - there were 29 open scallops on the card above, the nearest number divisible by 4 is 28. So I cut off one scallop and scored a line every 7 scallops.
Really pleased with this - I will photograph the next one step by step for a tutorial, but I think I need to try out a few different borders first :-)
I had previously made a couple of blanks as practice, but not decorated them. The paper is from an Authentique 6" paper pad which I had in my tote, and the flowers are SU punches, as is the bracket punch used to make the 'legs'. The border is a Fiskars punch.
Now there is a standard way to make these, but I have customised mine :-) The standard method is to cut a strip 11" x 6", border punch along one edge, then score at 2.75 inches, then at 5.5 and 8.25. Use the bracket punch at the base of each panel, but line up the card inside it so it only punches half of itself.
But .... I like the pattern repeats of the border to 'line up' with the scoring .... not that I'm obsessive or anything .... LOL. So I customised it. I cut a 12 x 12" cardstock sheet into two 12 x 6" strips. Use the border punch as before. Then count the pattern repeats - there were 29 open scallops on the card above, the nearest number divisible by 4 is 28. So I cut off one scallop and scored a line every 7 scallops.
Really pleased with this - I will photograph the next one step by step for a tutorial, but I think I need to try out a few different borders first :-)
Sunday, 26 February 2017
Colour Challenge 2017
Flame is the challenge colour this month over at Mystik Nat. It's orange veering a little towards red, not normally a natural choice for me, but I did enjoy doing these.
It's the same Chocolate Baroque stamp as I used for the Valentine card, but in two different shades of orange. The first one is stamped and matted onto a light brown cardstock and the second onto cream, both mats were embossed with a swiss dot folder. The sentiment is done with a SU stamp and punch.
Tuesday, 14 February 2017
Valentine Card
This is the card I made for DH :-)
The stamp is from Chocolate Baroque, after colouring I die-cut the image with Nesties labels 36. I had coloured a few images and had experimented with three different dies, this one fits the best :-) I embossed some cardstock in Sandstone from Craft Creations and adhered to a card blank in the same colour, for a nice tone-on-tone effect. The image is also stamped on the same cardstock. The sentiment tag is a SU punch and the sentiment is also SU.
Subscribe to:
Posts (Atom)