I haven't blogged since mid July ..... where did August and September go?? A severe lack of mojo combined with (or perhaps because of?) pressure at work meant that I made hardly anything during that time. Some half completed pages at crops, some half finished cards.... but no real inclination to finish anything. I have managed to cross stitch for 10 - 15 minutes every day, sitting in my car before work, which has resulted in a couple of finished pieces, more on those tomorrow :-)
The steampunk piece below is a class kit which I started at the Merly Impressions retreat, back in June. The original class item was this frame, covered with flowers ..... so not really my thing LOL. I brought it back home with the paper (Kaisercraft, not sure which range) attached to the separate pieces and that's how it stayed for, ahem, a couple of months. Finally I bit the bullet and put the pieces together, painted the mini frame, found a nice quote from this site, added the keys, the crystals and the other metal bits. It still needed a little more, so I made an interrupted border from silver nailheads.
Here it is in its final position:
I am very pleased with it :-) also I have made a great discovery - Cosmic Shimmer glue will stick metal to metal, now that is something which will prove very useful in future!
A blog for cooking and crafts
Showing posts with label metal. Show all posts
Sunday, 28 September 2014
Sunday, 4 May 2014
NESY - Steampunk Lady decorated box
UFO's, WIP's and NESY's ....... Unfinished Object, Work in Progress, Not Even Started Yet .... we all have them, don't we? I am trying to reduce the pile!
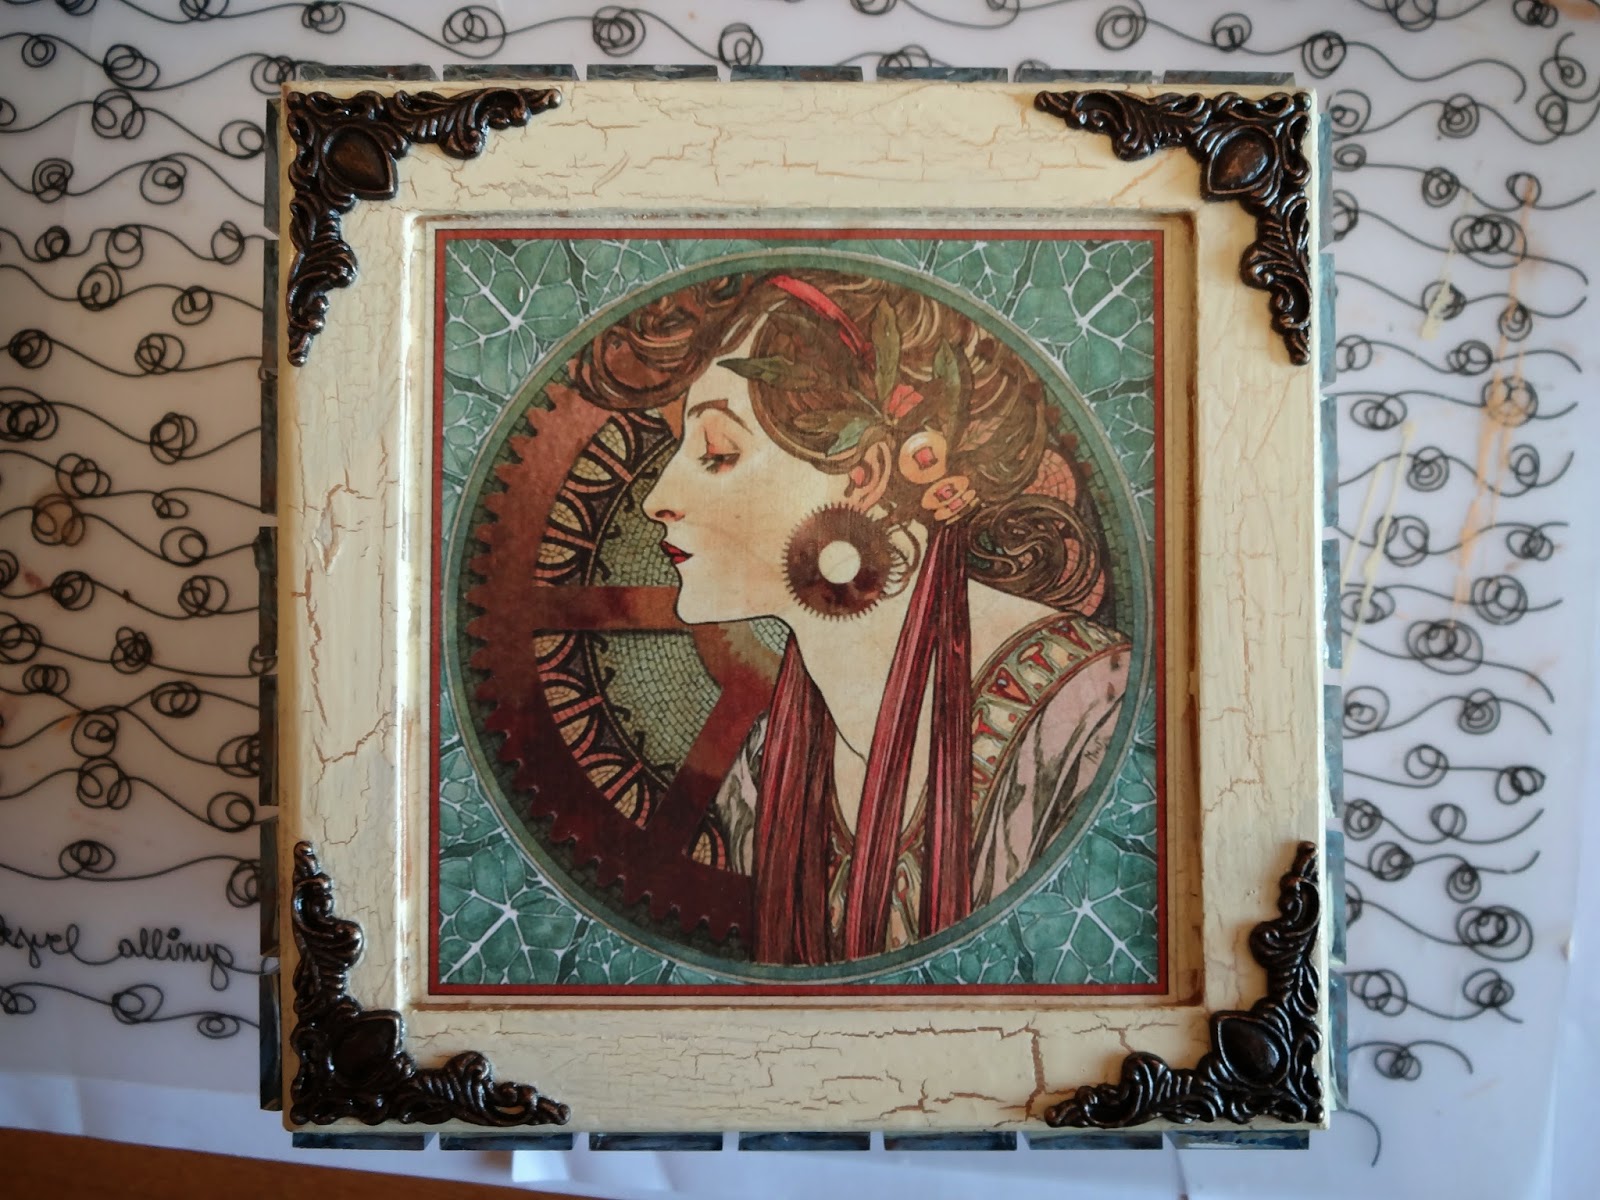
This one is definitely a NESY. I have had this box for three or four years and bought the Graphic 45 sheet of paper two or three years ago, specifically to use this image on the box. I even put the blank box on a shelf so that it was in plain sight and therefore would motivate me to do it! It's been there about a year ..... or so ......
The box after priming
Painted gold as a base colour for the crackle glaze
Crackle glaze applied, left to dry, over-painted with cream
I missed photographing a couple of steps LOL, but here is the box with Venetian paper adhered to it and a gold line on its base. Also the lid with the image, mosaic tiles around the edge and metal corners which have been alcohol inked to colour them.
A close up of the finished box
I am so pleased this is now finally finished - after three years or so of procrastination, it took a week overall, one step every evening after work and then the final bits this weekend. I have put it back on the shelf and am waiting to see when DH notices that it is done ........ :-)
Labels:
box,
crackle glaze,
decorated item,
metal,
mosaic,
NESY,
steampunk
Thursday, 28 February 2013
Black and gold decorated tin
I have to admit, this tin is, er ..... striking...... :-) Not my cup of tea, but that's OK, because it will be a birthday gift for my mother in law - and she will love it. It has been several months in the making!
It started life as a M&S Belgian biscuit tin in black and gold and yes, I bought the biscuits for the tin LOL. The lid had an enormous letter 'B' embosssed onto it, with the corresponding debossed image on the inside. There were also letter 'B's printed on each side of the tin base and the list of biscuit types on the base.
First I dealt with the inside of the lid and the printed base, by making gold card inserts to cover them. Then I had to think of a way to cover the big 'B' and I decided to use embossed black metal over thick card to make panels. Then I used the TH rosette dies in all three sizes to make the rosettes in gold card and vellum. The largest rosette also has an embossed gold metal centre with black crystal detailing. I cut gold and black crystal swirls into pices and put them around the rosettes. A line of gold crystal finished off the right hand edge of the largest panel nicely.
I was stuck for a long time on how to cover the side 'B's, ribbon was an option but I couldn't find one in the exact width I needed. Then it happened that I was using a scalloped circle punch for something else and realised that it was just the right size to go over the 'B'! So I punched out a gold circle, but it looked a little lonely, so I added two smaller ones each side of it.
The original idea was that I will make a general selection of cards to go inside, so she can send a handmade birthday card to whoever she likes. However I am now toying with the idea of a mini photo book instead ......
But at least the tin is finally finished!
Monday, 10 October 2011
Blond Moment & Simple Homemade magazine
Somehow a ray of sunshine managed to sneak in through the window while I was taking the photograph of this LO! This is the last photo of DS1 with blond hair - he changed it back to brown shortly afterwards, with some fetching red streaks :-)
The papers are from Rayher, I cut into them slighly to tuck the photo under the spiky circles. The small circles are chipboard covered with embossed metal. I die-cut the border and journalling box using Nesties and the title is robo-cut. Some lace, crystal flourishes, pearls and a little doodling were supposed to complete the page, but it needed a little something else, so I stamped some small flourishes which had come free with the copy of Simply Homemade magazine I had bought the day before.
The magazine itself was very good and I have got several ideas from it, but I have to say I was not too impressed with the stamps - they have almost no cling and fall off the backing sheet at the drop of a hat .... I have already lost one under my desk! I certainly wouldn't pay the £9.99 they are supposedly worth, according to the cover blurb!
Wednesday, 21 September 2011
Loot
I can't believe I haven't blogged for 5 weeks! Talk about real life getting in the way :-( Mind you that slice of real life did include a great holiday week in York and the fabulous Cardinal Colours retreat in Eastbourne last weekend. Great classes and wonderful to see old and new faces. Many thanks go to Jill and her team for organising such an amazing event! I completed 10 LO's - including Anita's wonderful canvas class.
This is the LO I completed for this month's Scrapology challenge - the theme is embossing, so the night before (and the morning of) the retreat I was stamping and embossing like mad so I could take enough motifs for this page with me! The photo is of everything I bought at Ally Pally in September last year and I was determined to use one of the bought items in the LO, so decided on the spirograph stamps (Maya Road).
The strip down the left side is punched using an EK Success punch, which was then stamped and embossed with a 12" border stamp. Then I stamped/embossed loads of the spirograph circles in gold, nutmeg and pearl gold on different cardstocks - ivory, black and bronze. Lastly I stamped/embossed a journalling block. Then I stuffed them all into my bag and set off hoping I had made enough!
I had the black embossed strip (Morrocan screen embossing folder - cuttlebug?) left over from another project - actually it had been a practice piece, but had come out too well to throw away! I also had some metal left over from one of my Ikea mirror projects, which had been embossed using a tiny mesh embossing folder and then alcohol inked - there was just enough to make a mat for the title. The spirograph images were punched out using scalloped and plain circles and layered up in twos and threes - well the original sketch had flowers on it .... and you *know* I don't do flowers LOL. Oh and I inked the ivory cardstock images with some chalk ink to match the background better, they were a bit bright.
The background paper is from Black Market Paper, the plain yellowy torn-edged paper is *I think* Basic Grey and the Harlequin paper was bought on my very first trip to the US in 2004, so I have no idea what it is! I am not really into tearing paper, in fact I cringed as I did it and Karen swore she heard the paper scream! But actually..... I rather like the way it has come out. The title is done with American Crafts Thickers.
It took a while to get everything positioned how I wanted it, then of course I had to disassemble to stick it all down! This is my favourite Scrapology page so far, I love it :-)
Friday, 1 July 2011
Belated ATCs
These are two ATCs which, embarrassingly, I was supposed to send out in a swap weeks ago ..... and I forgot :-( I'm really sorry Netty!
They are called 'Time to get in Gear' and 'Look into my Eyes....' LOL. 'Gear' has a smooshy ink background, overstamped with various swirls and a retro border. Then I added the embossed metal panel and the ribbon, bow and charm. The gears are the largest Nestie sprocket, cut up into segments - I outlined them with a zig pen as they didn't stand out enough. A few gems to finish off.
'Look ......' is much simpler! I stamped and embossed the owl - an old Elusive Images design now available from Chocloate Baroque - using verdigris embossing powder, then smooshed distress inks over the top. The embossed image acts as a resist so only the card is coloured. Two gems for the hypnotic eyes and it was done!
I hope the recipient likes them after all the time she has had to wait ........
Monday, 29 November 2010
MIrror 3 of 3
If I have taken one photo of this mirror, I have taken fifty!!! Finally I have managed to get a halfway decent picture to share with you :-)
I glimmer misted the mirror and stamped some flourishes in red and some cogs & gears in brown. Then I embossed some metal in the bigshot, but the colour wasn't quite right - ten second studio "bronzed god", it's a very cold brown so I alcohol inked it with ginger ink. Then I punched a square out of each pattern and stuck them on, along with some mosaic tiles and pearls. A charm made from beads bought in Venice completes the mirror, I attached it with a tiny screw eye I found in our local DIY store - I bought several, so I will be hanging all sorts of things from items I decorate in the future :-)
The second photo shows all three mirrors in their (miraculously level!) permanent position on the wall. I now need to go to Ikea to get some more, I have so many ideas........ :-)
Tuesday, 28 September 2010
Decorated Ikea mirror
A few months ago, Sy got some mirrors from Ikea and I asked her if she could grab three for me too. They have been sitting on the shelf ever since ...... not because I can't think of what to do with them, rather I can think of too many ways to decorate them and find it difficult to settle on one idea!
So here is the "metal" mirror. It was inspired by a patchwork metal tutorial on Alix's blog. I embossed several pieces of metal, using Ten Second Studio moulds and Cuttlebug embossing folders. Then I spent hours filling the back of them with a quick drying filler - this is so that when the piece is handled the embossing doesn't get pushed back down :-) The mirror was covered in TSS killer tape, I left the red protective film on, just lifting it in the area I was sticking each piece. I dithered trying to decide whether to do squares or organic curvy shapes ....... went for the curves and regretted it after a couple of pieces.... took much longer than squares would have LOL.
Alix had ribbon on her tutorial for the joins between the metal pieces, but I rather fancied using up some of my bead stash ..... so I applied some matte accents to most of the joins and waited for it to go off a little so the beads would stick instantly.... this was quite tricky and those beads did not want to behave!
Then came all the embellishments - mosaic tiles around the edge of the mirror, a couple of charms (keys), blingy earrings (the two owls and the jewelled circle, a large button, some more mosaic tiles here and there and some nailheads. I left the whole lot to dry overnight and I am still not sure those beads are secure ...... LOL.
Next day I painted the edges - which of course I should have done first - with Precious Metal paint in bronze.
Now I have to decide where to hang it :-)
Wednesday, 14 April 2010
Decorated Box
I have been working on this box for a while, couldn't post about it as it was Sy's bithday pressie! I gave it to her when we met up at Ally Pally, and she opened it at lunchtime - and I missed seeing the look on her face cos she didn't wait for me to get down to the lunch hall!!!!! Ooh, she's a one that girl ........... :-)
The box started out as plain pale wood. I glimmer misted it to within an inch of its life, it actually started as being much redder, but I felt it was too much so browned it down a bit, then put lots of bronze mist over it. The sides were stamped with stazon in brown for a subtle pattern, and I stamped and embossed some corners and a border on the top. When everything had dried, I coated it with an acrylic varnish. Next I put some self adhesive green suede on the base to stop it scratching furniture. I ran some copper metal sheet through my embossing machine for the top panel, stuck it down and then edged it with the mosaic tiles. Last was the flower. The photo - as always! - doesn't do justice to it, the flower is more pearlescent than it appears here and the flash has given a high shine to everything else, where really it is more gleamy than shiny :-)
Now for the inside. I painted with a copper acrylic craft paint, then lined the base with the same green suede. Then I made up the spring roll recipe cards, which I have been promising her for months now LOL, put them onto a book ring and added a tassel.
She liked it :-)
Subscribe to:
Posts (Atom)