A blog for cooking and crafts
Tuesday, 28 September 2010
Decorated Ikea mirror
A few months ago, Sy got some mirrors from Ikea and I asked her if she could grab three for me too. They have been sitting on the shelf ever since ...... not because I can't think of what to do with them, rather I can think of too many ways to decorate them and find it difficult to settle on one idea!
So here is the "metal" mirror. It was inspired by a patchwork metal tutorial on Alix's blog. I embossed several pieces of metal, using Ten Second Studio moulds and Cuttlebug embossing folders. Then I spent hours filling the back of them with a quick drying filler - this is so that when the piece is handled the embossing doesn't get pushed back down :-) The mirror was covered in TSS killer tape, I left the red protective film on, just lifting it in the area I was sticking each piece. I dithered trying to decide whether to do squares or organic curvy shapes ....... went for the curves and regretted it after a couple of pieces.... took much longer than squares would have LOL.
Alix had ribbon on her tutorial for the joins between the metal pieces, but I rather fancied using up some of my bead stash ..... so I applied some matte accents to most of the joins and waited for it to go off a little so the beads would stick instantly.... this was quite tricky and those beads did not want to behave!
Then came all the embellishments - mosaic tiles around the edge of the mirror, a couple of charms (keys), blingy earrings (the two owls and the jewelled circle, a large button, some more mosaic tiles here and there and some nailheads. I left the whole lot to dry overnight and I am still not sure those beads are secure ...... LOL.
Next day I painted the edges - which of course I should have done first - with Precious Metal paint in bronze.
Now I have to decide where to hang it :-)
Monday, 27 September 2010
Ally Pally Loot
We don't usually go to the September AP show, but a friend of ours from Devon was going so we decided it would be great if we could all meet up. Sy drove down to Karen on Friday night, they picked me up Saturday morning, we went to the show, then Sy stayed with me that night and we had a craft day on Sunday. I am going back to work today for a rest !!!
I bought loads of Herma, found some at a good price and it is my most expensive consumable so I was pleased with that.
Several stamps: Lavinia Stamps - owl, bamboo, dragon, weedy flower thing, silhouette castle. Maya Road - geometric shapes which look like Spirograph patterns, so now I can stamp them much better than I could ever draw them LOL. Artistic Stamper - a background and inspiration bottles. The recycled Rubber Company - steampunk stamp set.
The odds and ends: some Ten Second Studio metal and killer tape, a couple of packs of magnetic snaps, some ribbon bows though the colour which I thought was a dull gold turned out to be khaki green in daylight ... never mind! ... stencil tape and brushes, Decopatch papers and brush, scalloped circle punch, brayer, alcohol inks and blending solution, one distress ink pad (Milled Lavender).
And hiding beneath all that lot is the main item on my list .... a Hougie scoreboard. I bought it first because they didn't have many and it was very awkward to carry around - but hopefully it will be worth it :-)
Thursday, 23 September 2010
Stop Raining LO
This LO is of next doors' cat, sheltering in our garden because she didn't want to get wet!
The papers are all from stash, I am fairly sure the main background paper is K & Co but I am not sure about the others! The title is cut on the robo out of Bazzill Mud Pie, the fancy squares are punched from scraps of Bazzill, and the scroll up the side is Prima Say it in Studs in bronze.
Wednesday, 22 September 2010
Make a Wish LO
I made a resolution this year - not to buy new papers until the pile of old ones has gone down significantly - and mainly I have stuck to it. The exceptions were some Craft Creations Christmas papers and three sheets at the last crop which were two diecuts and the paper pictured above, which I think is Bo Bunny Mamarazi? I have used all three, so that's not too bad!
This LO is about DS2's 18th birthday cake - he wanted a Star Trek shaped one, but while cake baking is my thing, I am not so hot on cake decorating!!! So I made an oblong cake and "drew" the shape on top of cream cheese icing with maltesers, then cut out the star freehand from melted & cooled chocolate ..... I got no complaints :-)
This is a very simple LO, as the paper does most of the work - I just added photos, title (American crafts thickers) and journalling (done on safmat)...... oh, and the four "captain's pips" at the side of the photo :-)
Tuesday, 21 September 2010
Cardinal Colours Retreat
What a fabulous weekend! I had never been on an organised retreat before, in fact I had never even been to a class :-) Now I feel like I am an old hand........ Three classes were enough for me (though I could have taken five) and there were make and takes to do too - I did a little beaded charm.
The rest of the time I spent doing my own thing, I had made up several page kits and managed to complete ten LOs and part-finish three others. Plus a couple of cards and the class stuff! I really got a lot done and I am very happy with the results.
This snowy LO has a lot of cutting included, all out of Bazzill Bling Diamond - the large snowflakes and the small swirl are cut with a Marianne D die, the small snowflake with a Martha Stewart punch, the letters and long scrolls with the craft robo! The journalling is typed on safmat and there a e few small clear gems dotted about.
Thursday, 16 September 2010
Butterfly ATC
This is an ATC I recently swapped, I can blog it safely as it has been received :-)
I had done the background quite a while ago and then got stuck on it, so it went in my "what shall I do with this" box. The butterfly is one of several which I had asked DH to laser cut from clear acrylic, I had planned to try colouring them with alcohol ink. The two ideas suddenly came together! I added the text - printed on safmat - and a bling trail for the butterfly.
This will be the last blog post for a couple of days, as I am off to the Cardinal Colours retreat this weekend - and I have sooooooooo much packing to do........ :-)
Monday, 13 September 2010
Gothic Arches
I should say first that I didn't make this :-) DH has a laser cutter, he found some plans on the net for some gothic arches and after much cursing and waiting for glue to dry, here is the result. They are made of clear acrylic (very difficult to photograph!) and I have put a Yankee candle next to them for scale.
The question is, what do I do with them now?? I have vague ideas of making them into a Christmas decoration, but if any of you have any other suggestions, I would love to hear them!
Saturday, 11 September 2010
Snowy Christmas Cards
Last night I had a sudden urge to get back to doing Christmas cards and these are what I came up with :-)
The card on the left has a snowflake embossed background, with the snowflake trail and sentiment stamped and embossed in silver - the image is raised by 1mm foam pads, and the sentiment by 2mm.
The second card has a background using a Craft Creations snowflake paper and the sentiment stamp is again stamped and embossed in silver. The snowflakes are made with a Martha Stewart punch and the pearly swirls are Basic Grey opaline.
All mats on both cards are made from the use-it-up mirri card blanks. I am doing quite well on using up all these old blanks, so I think I will have to do a count and let you know how many there are left :-)
Thursday, 9 September 2010
September Craft Weekend - part four
At the crop on Sunday I worked on half a dozen LOs, but this is the only one I finished, probably because I had it partway done from the previous crop LOL. The corner swirls were stamped in two shades of blue and then I added the little navy buttons. I think the paper may be K & Co, but don't quote me on that ...... The rub ons forming the frame around the title (Heidi Swapp) are something I thought I would never use, but now they are another successfully busted bit of stash! The title itself is printed onto Safmat - originally I had been going to cut it out on the Robo but the blade finally gave up the ghost - however I rather like this font, it has come out really well :-)
For those who need to know .... the font is called Mutlu and is a free download from .... um .... somewhere I can't now remember, but possibly dafont.com :-)
Wednesday, 8 September 2010
September Craft Weekend - part three
This is the last card I made on Saturday, very simple idea but it has turned out well I think :-) It uses two old card blanks (a pastel and a mirri), the swirl is a Marianne D die and the sentiment is done with two Nestie ovals, raised up on foam pads for a bit of dimension. I still have quite a few of the square pastel blanks left, I can see this idea being used again!
Tuesday, 7 September 2010
September Craft Weekend - part two
On Saturday, I was playing around with distress ink backgrounds and this card was the result. The mat has the borders and crackle background stamped over the distress ink, whilst the lady was stamped in versafine, then had the DI smooshed over the top. Next time I might trim the sides of the cream card blank down, as I think there is a little too much showing, but apart from that I am quite happy with it! The triangle lady is a stamp I bought at Ally Pally, so I am one more step towards using everything I bought there before the year is out :-)
Monday, 6 September 2010
September Craft Weekend - part one
Had a great craft weekend as usual, Sy came down on the Friday night and brought her Tim Holtz DVDs with her - we stayed up late watching them! Although his style is not mine, I am starting to have a go with distress inks, so it was interesting to watch. The alcohol inks section was informative too, will be having a go with those at some point :-)
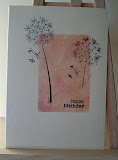
On Saturday we went over to Karen's, I got a lot of stitching done, then made some cards. I got my first subscription issue of Craft Stamper the other day (having waited ages for a subscriber gift which I liked!) and I am determined I am going to try at least one thing from each issue - as opposed to reading it, thinking "that looks good" and then putting it away....... LOL. There was a feature on masking off geometric shapes with post-it notes, distress inking the resulting aperture, then adding a silhouette stamp. Simple yet elegant, what could be more up my street??
The cards above are what I came up with .... plus a fourth one for which I used a stamp which proved to be totally unsuitable...... that one will never see the light of day again, I can tell you! My favourite is the dandelion heads :-) I am really pleased with the results and will definitely do this again, though I will buy big post-it notes - I only had teeny ones and trying to line them all up to form a big enough aperture took me ages LOL. Oh and I think I need some more silhouette type stamps ......
Friday, 3 September 2010
Christmas decoration
Just a simple decoration :-) I painted the triple frame with Viva Decor in Emerald Green, then it sat on my desk for about a week whilst I got around to digging out the large christmas brads I had intended to put in each frame. However - disaster! The brads were an entirely different and clashing shade of green, they looked awful.
So back to the drawing board - I rummaged in the "Christmas bit and bobs" drawer and found these poinsettias and also some old background paper I had forgotten about. I cut the paper to fit - you can't really see much of it, but the white card that came with the frame would have been glaringly obvious! After putting the poinsettias in each aperture I decided it needed something else, so I added the red pearls.
And by the way ...... poinsettias don't count as flowers ...... they are part of Christmas LOL.
Thursday, 2 September 2010
Glimmer Misted Box
I started this box several months ago - yes, months! - by glimmer misting a plain wooden treasure chest in Midnight Blue and a bit of Candlelight. Then I stamped a couple of corner swirls with Timber Brown Stazon. It looked OK, but needed something more, and I couldn't think what, so I left it ....... it has been sat on the shelf behind my desk, staring at me accusingly, ever since.
Over the Bank Holiday weekend, I decided to stop procrastinating! I knew I wanted the three mosaic tiles on the front but couldn't decide on the rest of the stamping. Then I remembered some of the stamps I had bought at Ally Pally, a compass and two sizes of pocket watch. Perfect. I stamped them on in Teal Stazon, stuck the mosaics on with Matte Accents and it was done! It took me all of 20 minutes to actually finish this thing that had sat around for months :-)
Wednesday, 1 September 2010
No, really, I DON'T do flowers
Some more stashbusting cards - that bag of flowers does not seem to be getting any smaller though! The card blanks are from the "misguided gift" pastel set, actually I will admit to quite liking this green :-) The mats are made from a metallic gold blank and the die cut frames are cut from a glimmer misted "ugly mail order mistake" blank. The butterfly is from the infamous Primark necklace which so many of us crafters have bought to take apart - I wonder if they know why their sales have gone up????
I am flowered out now - the bag can go back in a drawer out of sight - normal service will resume forthwith :-)
Subscribe to:
Posts (Atom)