A blog for cooking and crafts

Tuesday, 9 October 2012

Steampunk-ish triple frame


I bought this triple frame at one of those little warehouse shops which has a bit of everything - can't remember what it was called - when we went to York last year and it has been hanging around ever since, waiting for inspiration.
The lightbulb moment came when I was tidying my desk (something which doesn't happen that often!) and a whole pile of scraps from the Bo Bunny 'Timepiece' range came to light.  I put one torn piece against another, decided I liked the effect, and went from there!
The frame originally had the glass at the bottom of the recess, but I wanted to have some space for a dimensional collage, so I stuck the glass to the front of the frame with 'red' super strong tape.  Of course this can be seen through the glass, so I made a border of faux nail heads to cover it.  I liked the effect of a little shelf and decided to get some little bottles to go in the square frame.
The mosaic tiles are there because the frame is slightly chipped at the top - where we dropped it when unloading the car! - so I put a couple of tiles at the chipped spot and added others in various places on the frame, connecting them with black faux.nailheads.


The lower collage uses rosettes made from TH dies, a Dienamics flourish, a sentiment stamp, some pearls and an owl charm.


The square collage has the sentiment stamp, die cut with a deckled oval Nestie, edges inked.  Then some clustered pearl elements (can't remember the brand) and three tiny bottles, filled with polished glass chips. I had great 'fun' getting those chips into the bottles, the air was blue!


The upper rectangle collage is the one which started the whole train of thought, these were the two pieces of paper I put together.  I stamped a sentiment three times, the steampunk heart is stamped and embossed using a Technique Tuesday stamp,  Some pearl trails and a couple of charms complete it.

Not a cheap project this one, despite the collages themselves being made mostly from scraps and stuff I had hanging around - I did have to buy the bottles.  The frame itself was £8 and it took far more nailheads than I had thought it would - between 8 and 9 packets in total, so that's about £17 just in nail heads!!!  Probably would have thought of something else if I had realised that before I had started!

I love it in spite of the expense :-)
Posted by Picasa

Thursday, 4 October 2012

H is for Hexagons - Scrapology September challenge


Just sliding in under the wire for this challenge, the closing date is tomorrow!  You can find the Scrapology September challenge here.

I used some old papers here - the base layer is from the DCWV luxury stack, which I bought online and hated from the minute I got it, it's really too shiny for me.  But as a base layer it isn't doing too badly!  I cut an inner square from some old snow swirl paper, which I think I may have bought on one of my trips to America, so that's either 2004 or 2007!  The hexagons are punched out of a Craft Creations paper from a couple of years ago and matted onto Bazzill (Admiral?), using a Creative Memories punch.

I used a 12" border stamp from Hero Arts to go around the edges of the frame, wasn't sure how that was going to turn out, but I really like it.  The title is robo-cut and the snowflakes are done using a Martha Stewart punch, both out of Bazzill Bling in Diamond.  The snowflakes were made into 'bunting' to follow the sketch, by using white embroidery thread attached to brads at each end.

I am very happy with this one :-)
Posted by Picasa

Tuesday, 2 October 2012

Sunflowers


A couple of weekends ago I went to the Paperarts UK retreat in Swindon.  Great fun, very hectic, with six classes to fit in!
This is one of them, taught by Rachel Elliott.  Not my normal style at all - you all know I don't *do* flowers! - but it was my favourite out of all the classes.  The papers are Prima, I think 'Sunkissed', and it was all about layering and fussy cutting.  The papers are used very cleverly - the base layer had the entire centre gutted out, then white cardstock over the hole, then the gutted part on top of the white as the next layer.  Somewhere in there is a bit of lace, just peeping out from under a layer - that was stitched on, which I have never done before and I think I will do it again, looked much better than trying to glue it.  All the flowers and butterflies were fussy cut out of the sheets and tucked under the photos, or layered on top.  The little date tag is slightly offset in the photo, I have since moved it to the centre, where it looks better .... thank heavens for repo adhesive!
The photos are of a visit to my Nanna, with my sister and her kids, I plan to put this into a box frame and give it to Sis for Christmas.
Posted by Picasa

Wednesday, 26 September 2012

CAS birthday card


A clean and simple birthday card - I actually made this back in August, for DH's birthday, but forgot to blog it.
Not a brilliant photo I'm afraid -light is awful at the moment and there is no space on the table to set up the photo studio!
I took a 6" pearlescent white card blank and made an interrupted frame from peel off lines and sentiment.  The heart is done with a Cheery Lyn die and just plonked down - er, I mean artistically placed - in the centre.  Very simple, but it does look really nice!
Posted by Picasa

Sunday, 9 September 2012

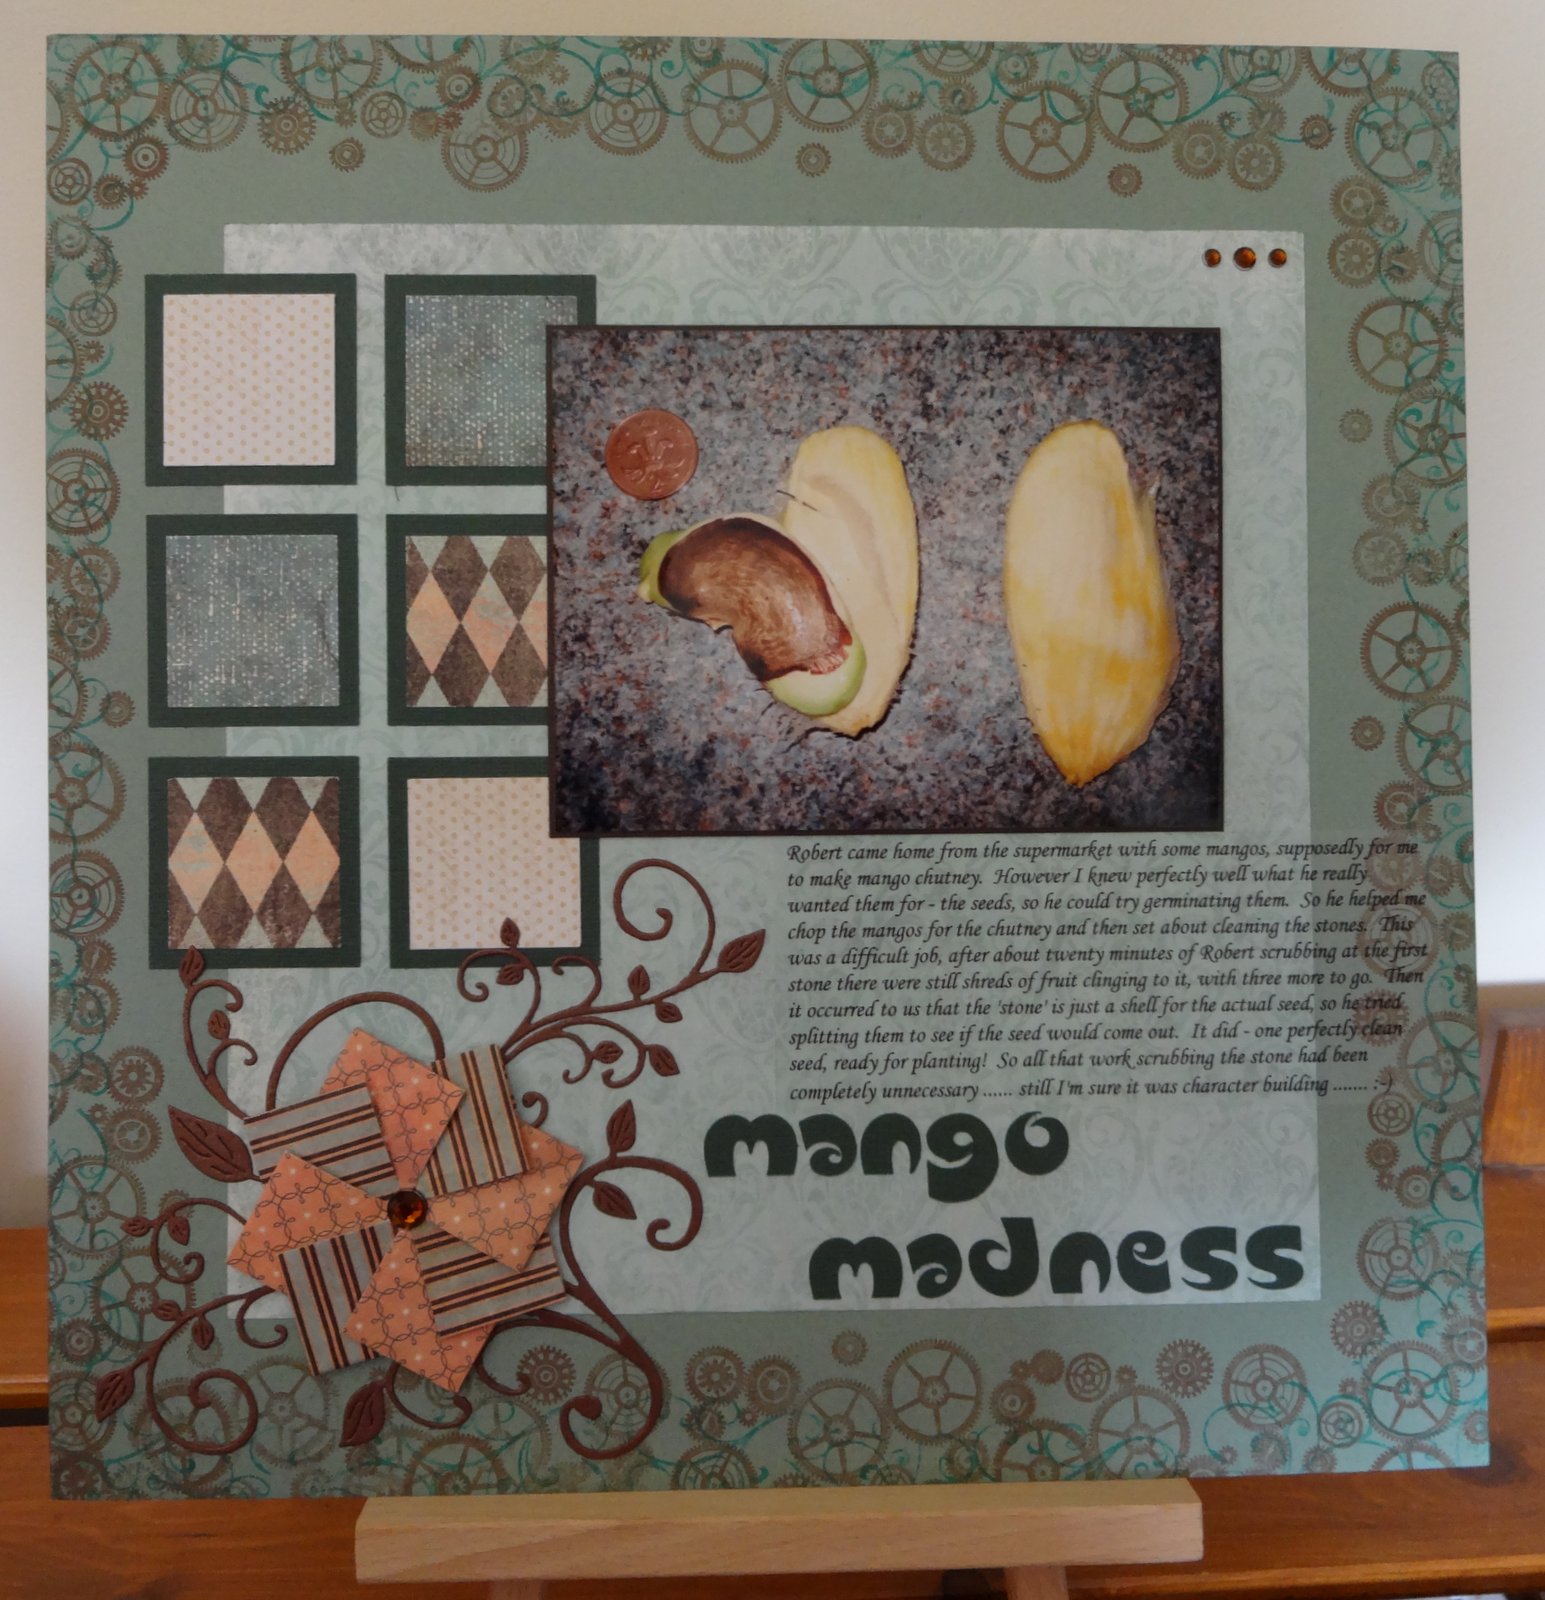
Mango Madness


I have so many pages needing just some journallng to finish them off - so I finally printed all the journalling blocks out onto Safmat and am now working my way through them!
This page is about DS1 buying me some mangos "to make chutney with".  He really wanted to try growing the seeds!  So I made him help chop the ingredients and then he set about cleaning the stones.  20 minutes later, the first stone still had bits of mango clinging to it and there were three more to go.  It occurred to us that actually, the stone is just a protective shell around the seed, so we tried splitting it open - and out popped a perfectly clean seed.  All that effort had been unnecessary!
The layout is based on a UKS challenge sketch.  I stamped swirls and cogs around the edge of the smooth bazzil, the central square is from the 7 Gypsies Venice collection, as are the small square blocks and the teabag-folded embellishmant.  The leafy flourishes are die-cut using two sizes of the same Cheery Lynn die and the title is robo-cut (font: Slugfest).
Posted by Picasa

Thursday, 6 September 2012

Exterminate


DS2 encounters the Daleks at the Dr Who experience!

The background paper is from Craft Creations, it's an all-over splotchy design and I stamped the swirls and gears around the edge.  The other papers are from my scrap box, I think the mustard-y one is an old Basic Grey, the cogs and gears paper is another Craft Creations one - I tore and inked the edges of both.  I ran some bronze cardstock through the big shot in a dotty embossing folder, then robo-cut the title and embossed the letters in the same way using a wavy design folder.  A few eyelets in places and a bit of journalling to finish. 
I really like this one, not my usual colours but I think it works!
Posted by Picasa

Wednesday, 5 September 2012

Decorated Frame


I haven't blogged since May!!! A combination of real life getting in the way, and severely depleted mojo has resulted in my not doing much crafting at all, except for half finished LOs at the monthly crop and some half finished decorated boxes. There's a theme there somewhere......
 
But I had to finish this frame - it's Krafty Karen's birthday present!

This is quite an 'upcycled' project!  Several things came together for this - the Prima almanac kit I got at the Trip down Memory Lane retreat had the large flowers and the pink paper. DH had returned from his parents' house with some picture frames he 'thought I could do something with'. The butterfly is from an old necklace, the stamped quote is a paraphrase of a Marillion song (Happiness is the Road) - Karen loves pink, flowers, butterflies .... and Marillion! The turquoise stripe paper was also bought at ATDML, I think it's from My Minds Eye. The smaller flowers..... well..... I bought those. Yes, I bought flowers. Only used half the pack, so Karen, guess what your Christmas pressie will feature..... LOL.

This project is also the first one where I have used my cordless glue gun, to attach the flowers and butterfly. I have never previously got on very well with glue guns, but after I had finished the flowers, I found myself standing in front of my craft desk, gun in hand, thinking "what can I glue next ......" whilst looking round the room!

Posted by Picasa